Bay Bridge Assay 2

…in which we try again…with extended reach!
Bay Bridge Assay 2—our second visit to the San Francisco-Oakland Bay Bridge—took place on March 19, 2016. My primary objective was to collect some actual cable samples; secondary was to introduce Jacob to yet another bridge. As mentioned in Bay Bridge Assay 1, safety barriers prevented me from reaching actual suspension cables the first time. Today we would test the extended reach gizmos I concocted in my T Rex dreams.
Contents
- Accidental tourism
- Treasure Island
- Finding the Burma Road trailhead
- Bridge walk and samples
- More ruminations on the old span
- Ghosts in the machine
- Lessons learned
Accidental tourism
My initial Bay Bridge adventure with Martin was influenced by an outdated GPS map. Jacob and I had discussed the value of easy-to-use GPS loggers for phonography—specifically, we’d like to geo-tag the sound samples in audio file metadata, which our recorders don’t do—but hadn’t reached a purchasing decision. So it was going to be cell phones, pencil, and paper for the sound walk, if we bothered. Since I’ve been using—and loving—Waze for my daily commute, I decided to try it on the driving leg of the trip. I programmed 345 Burma Road into Waze as we left Campbell, California that morning.
Anticipate a future blog post here about map editing in Waze. It turns out that one issue with crowd-sourcing your map data is that they become more iffy as the crowds thin. There seems to be a shortage of crowds and Wazers in the Port of Oakland. The truckers and freight handlers must find their way by other magics. The maze of twisty little passages underneath the 80s is poorly documented and still a bit of a mess in the aftermath of the east span replacement. I will attempt to help future generations of bridge enthusiasts and photographers someday soon.
As we passed the last unpaid exit before heading over the span to San Francisco and approached the toll booth, Waze announced “You have reached your destination!” The map information for Burma Road stopped there: at the toll booth. I asked Jacob for a five-spot to expedite our passage, not having anticipated this. We decided that, as long as we were going west anyway, we’d get off at Yerba Buena Island and have a quick look at the old 1939 Golden Gate International Exposition grounds on Treasure Island.
Go to…
- top
- Finding the Burma Road trailhead
- Bridge walk and samples
- More ruminations on the old span
- Ghosts in the machine
- Lessons learned
…or read on:
Be sure to visit before the sea level rises
Treasure Island is a man-made attraction rising just a few feet above the San Francisco Bay high tide line. It deserves a travelogue all its own, and one day we may return to give it one.
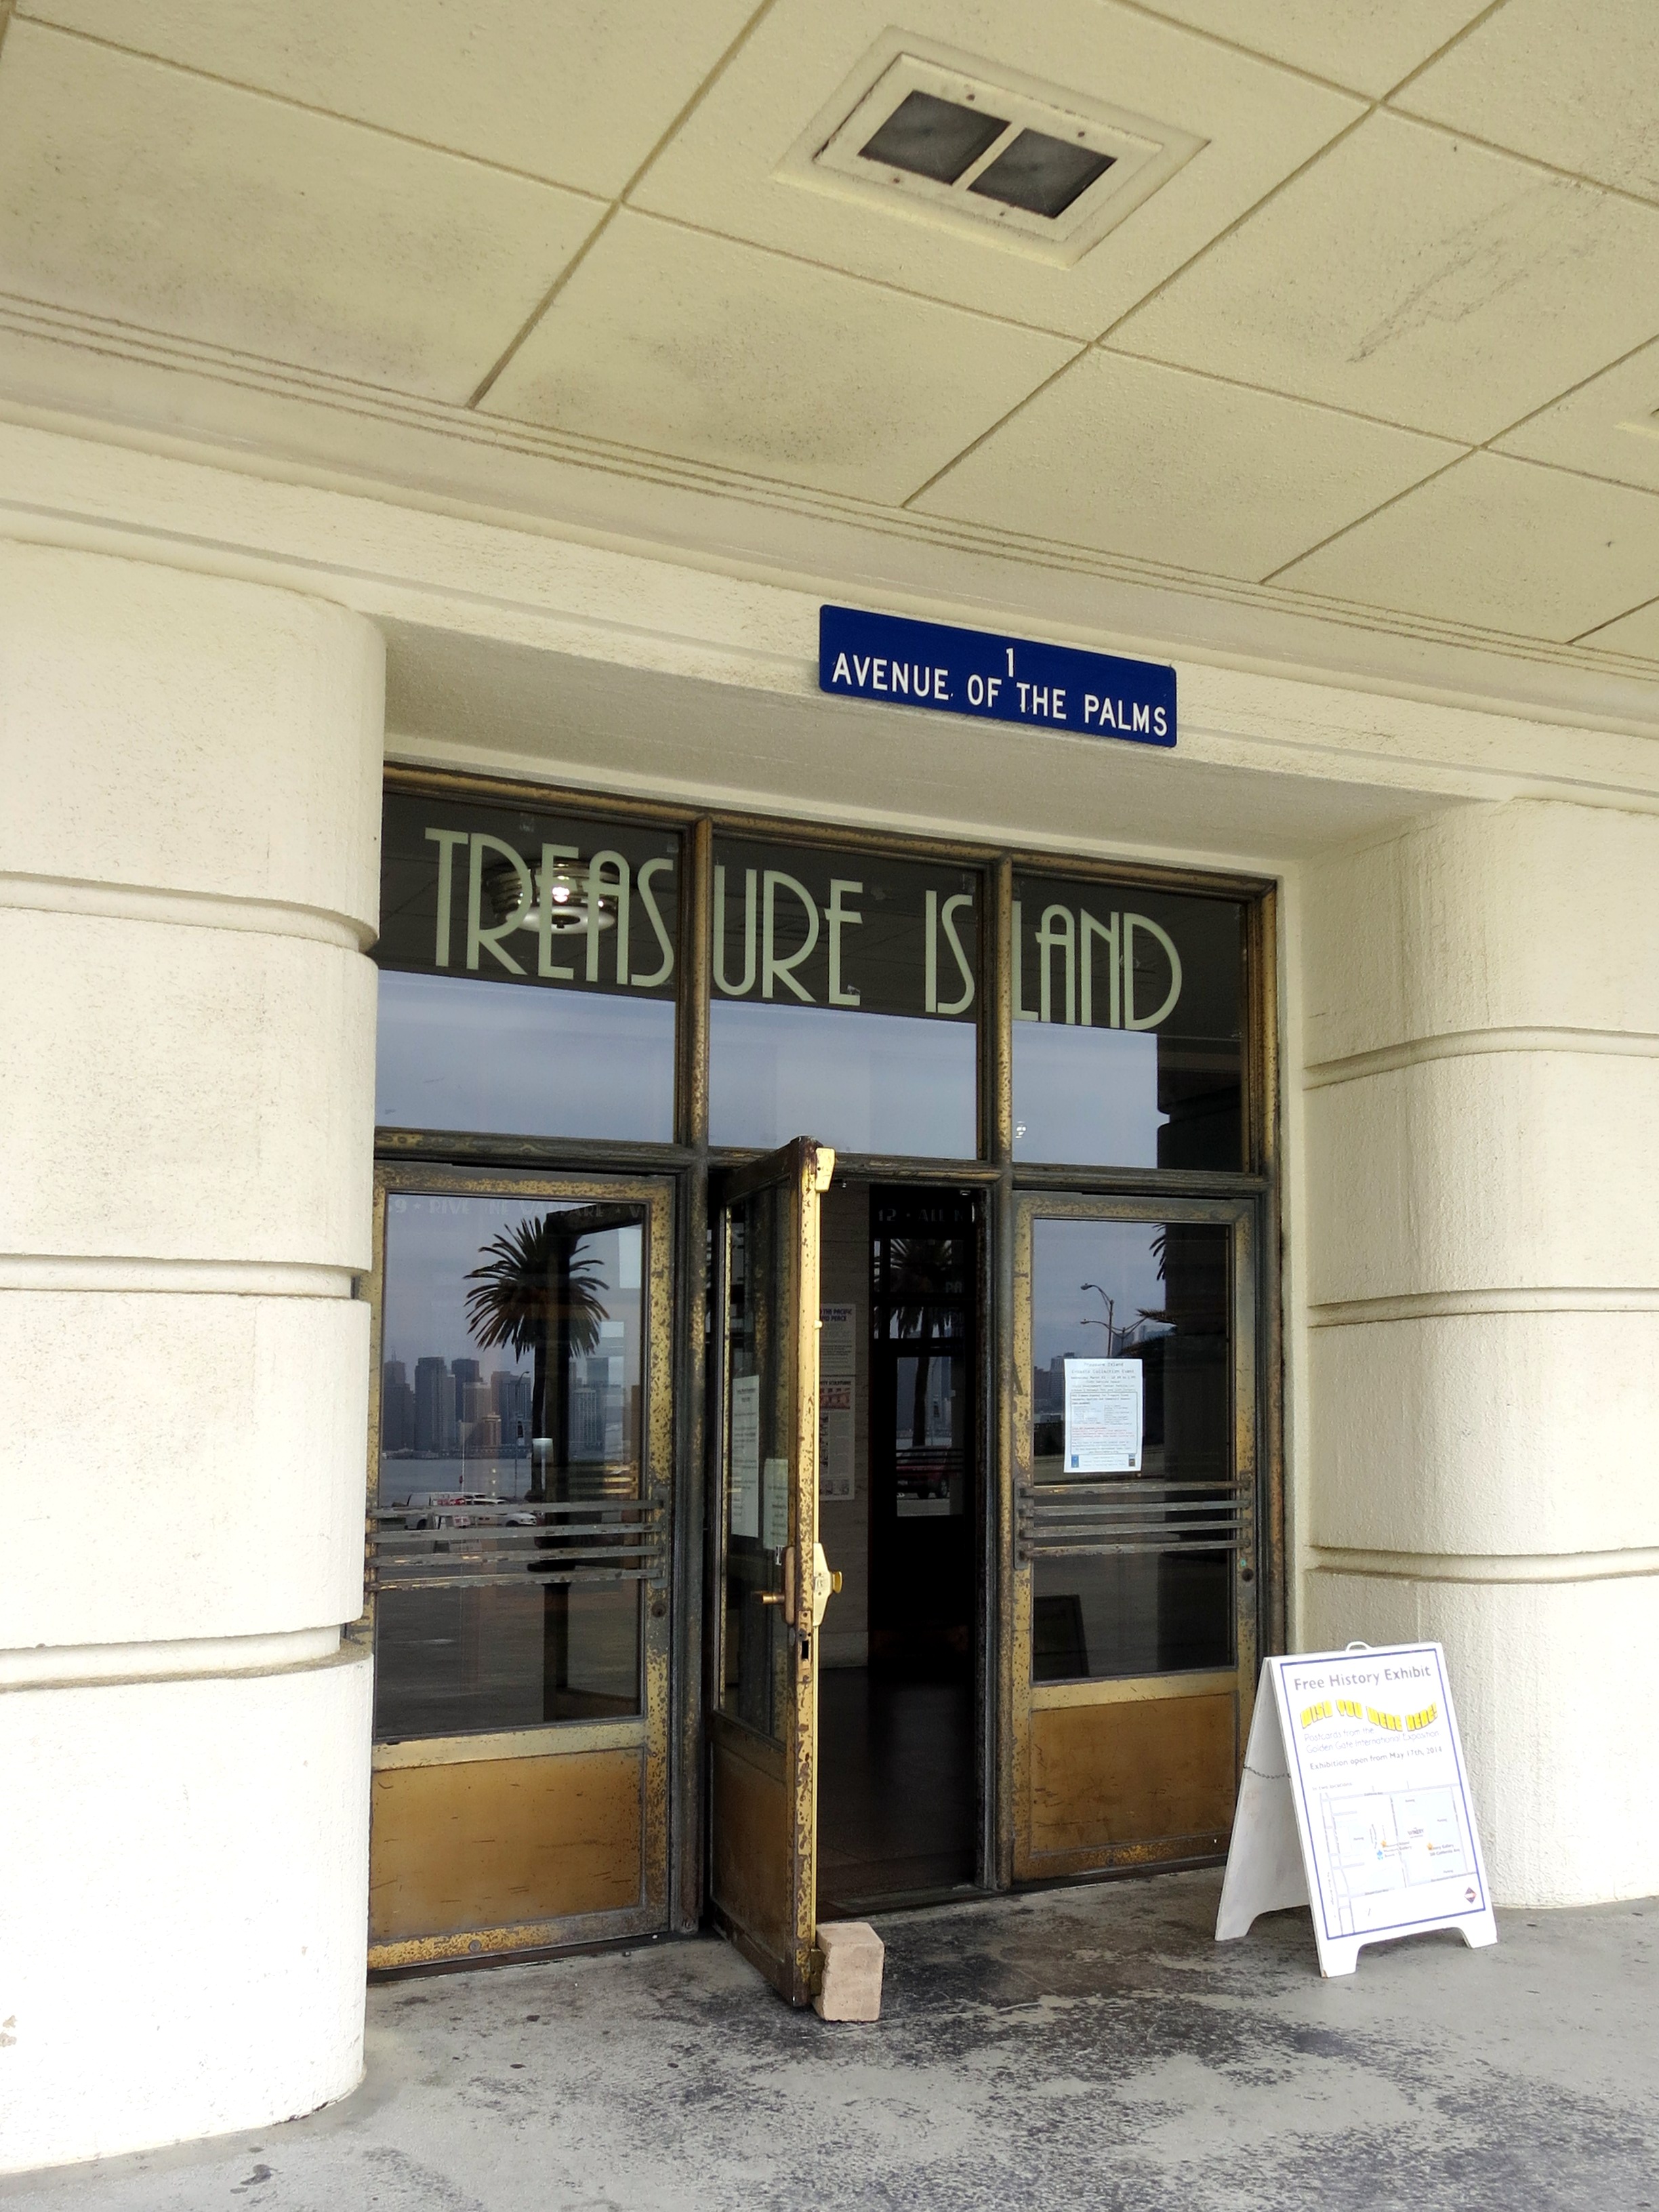
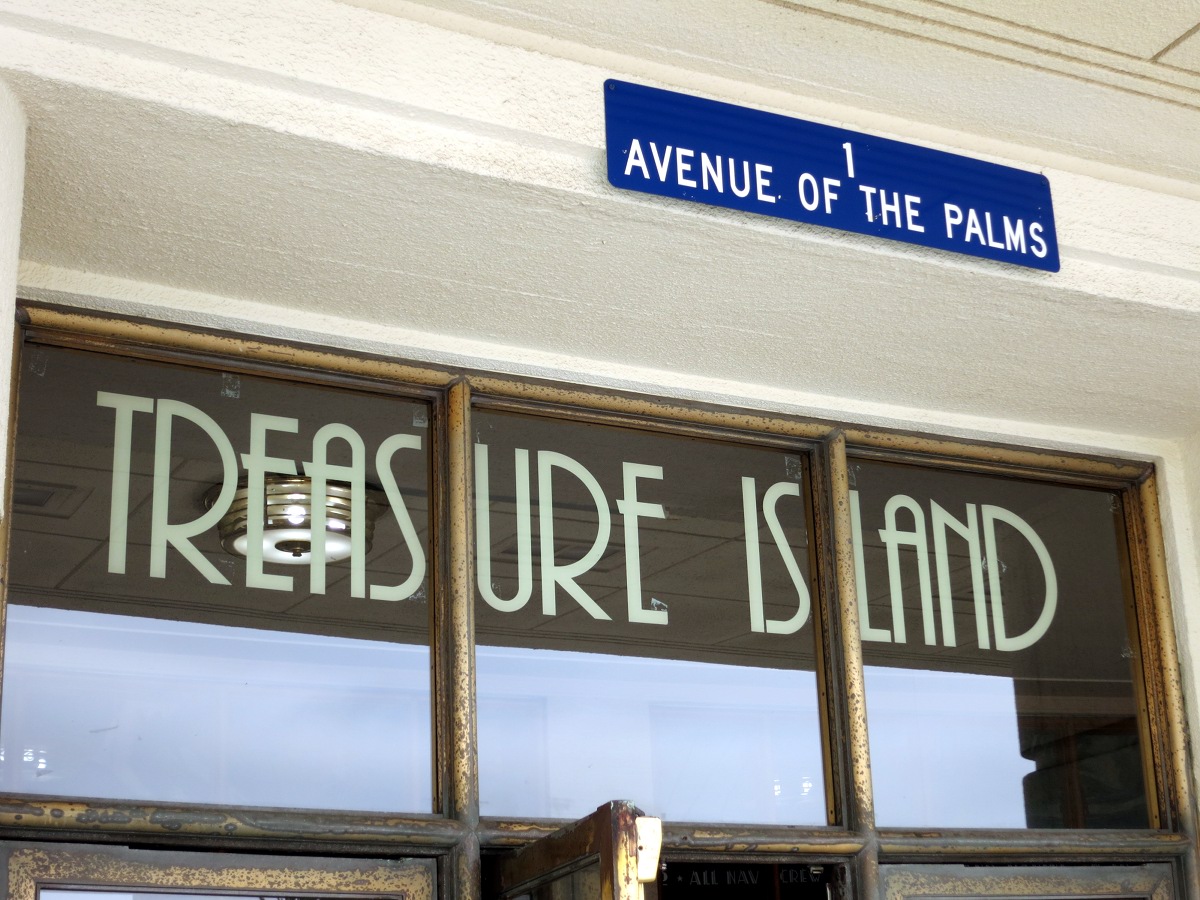
Meanwhile, it was just an accidental waypoint on this trip, and we didn’t have that much time to spend. So we poked around the old fairgrounds entrance hall long enough to get a few photos and appreciate some of that old Art Deco blend of hopeful futurism and streamlined ornament.
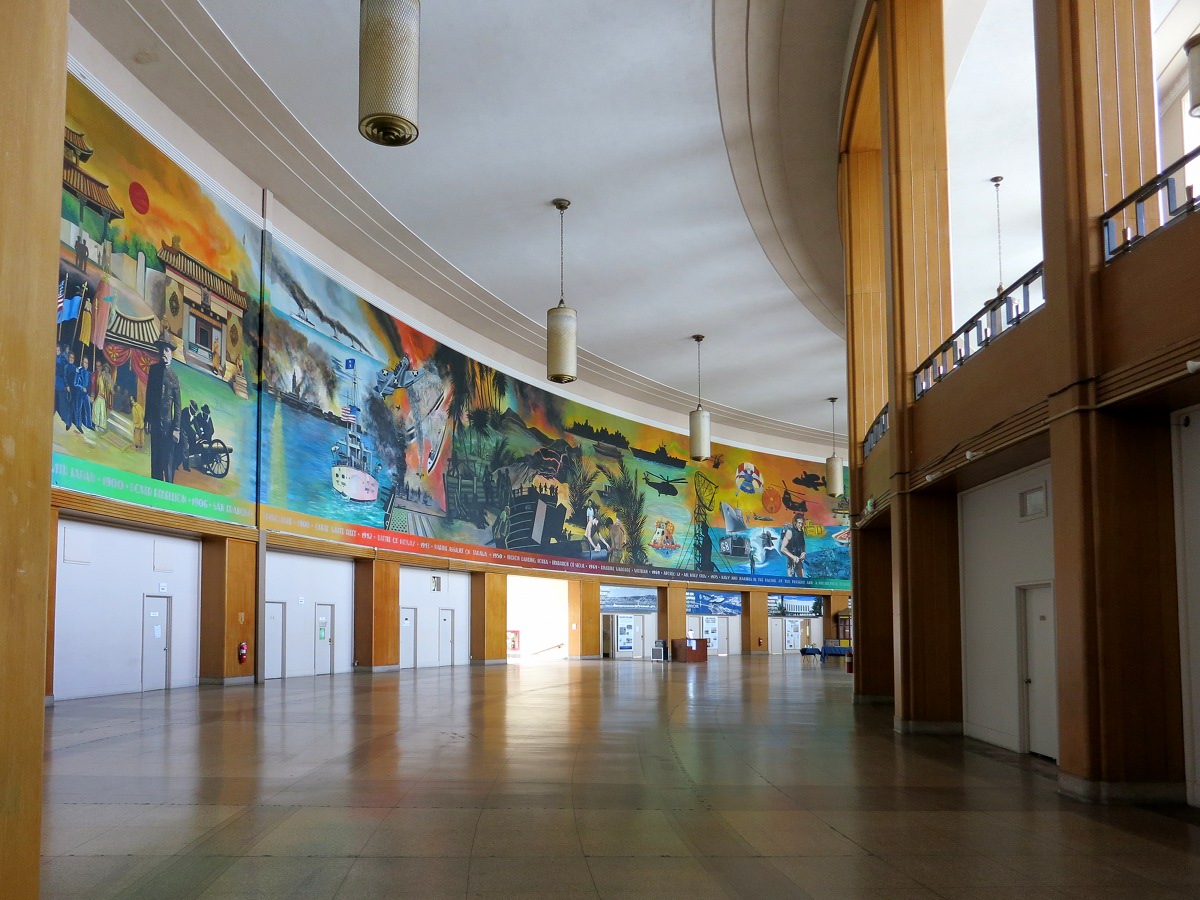
There was a museum at Treasure Island until the late 1990s. There remains a museum association dedicated to its memory. At One Avenue of the Palms, historical lectures are delivered under a bright mural depicting local history. Tables staffed by volunteers offer brochures and philanthropic opportunity. The entry hall is tall and echoing; missing the bustle of the throngs it was built for, today it invites the hush of a library.
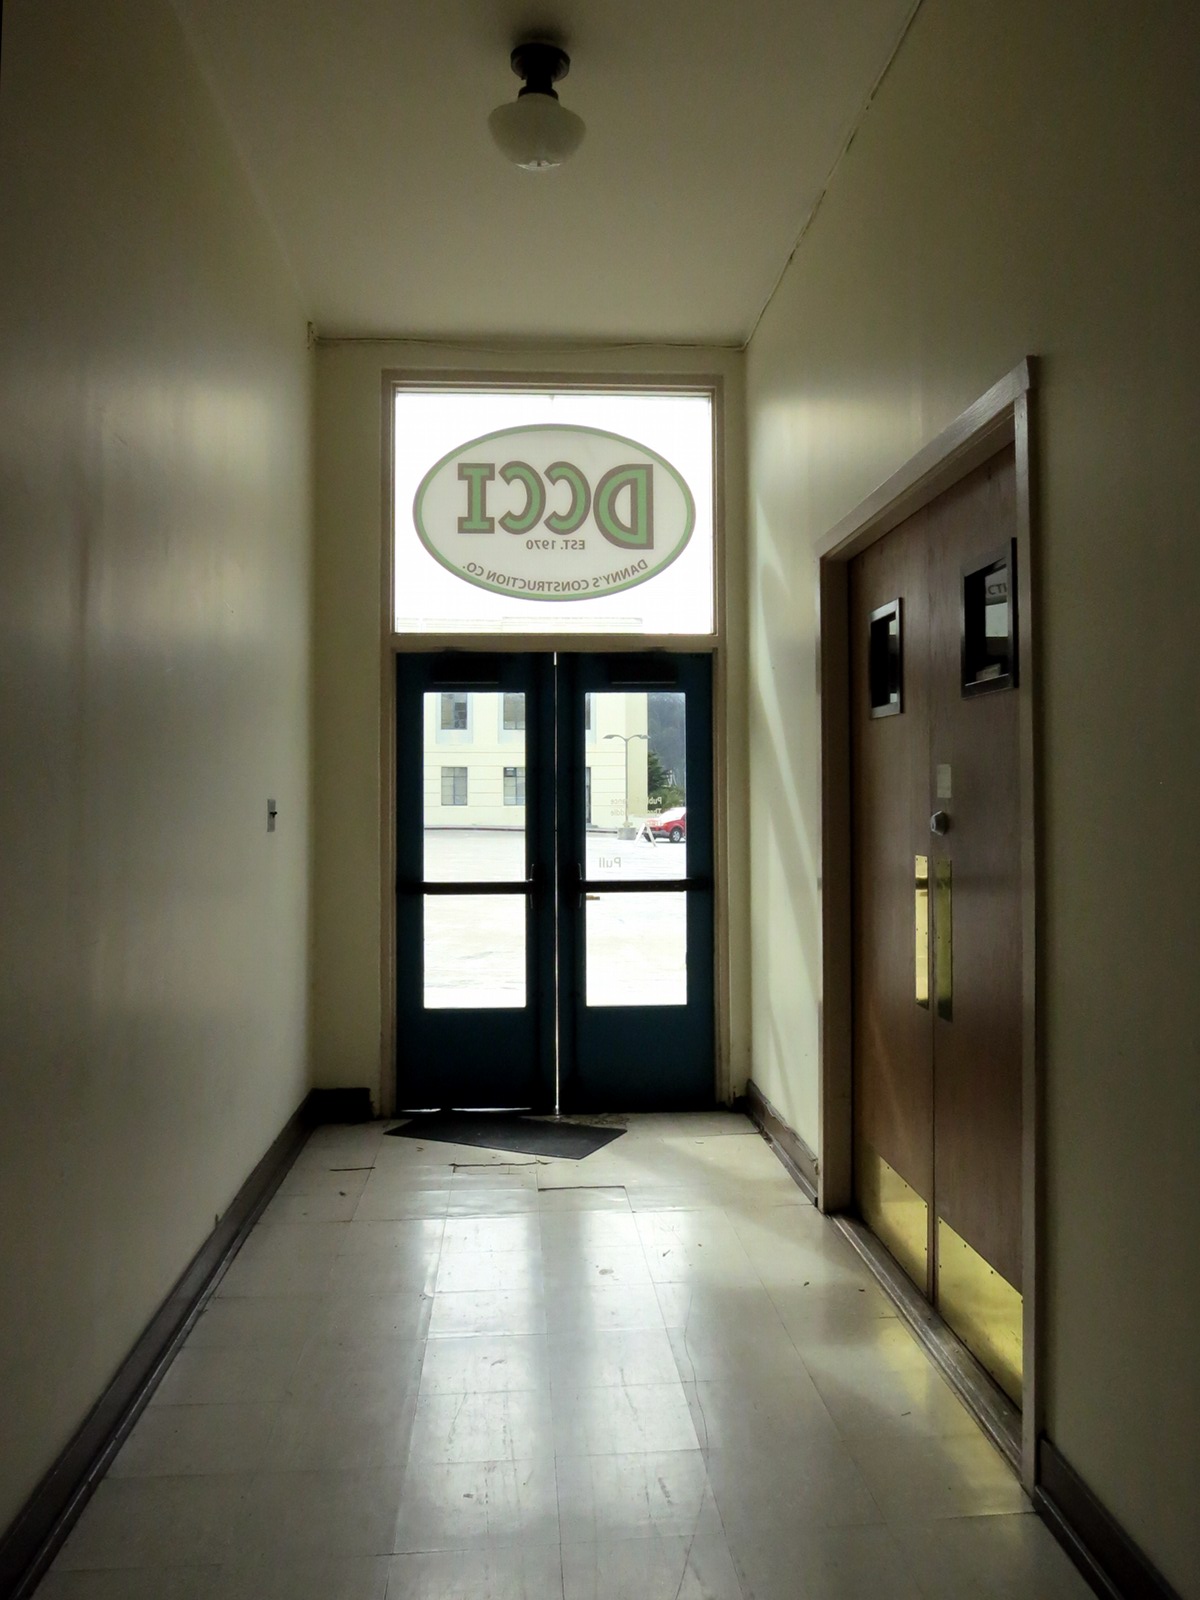
Things do appear to be going on out on Treasure Island. It’s not clear they are on a path to success, but attempts are clearly being made to do something with the place. Inside the old entry hall, various doors hint at past or present urban operations: “DCCI: Danny’s Construction Co., Est. 1970” (this is the western branch office); “Suite 168: Treasure Island Villages“; a police precinct administration office.
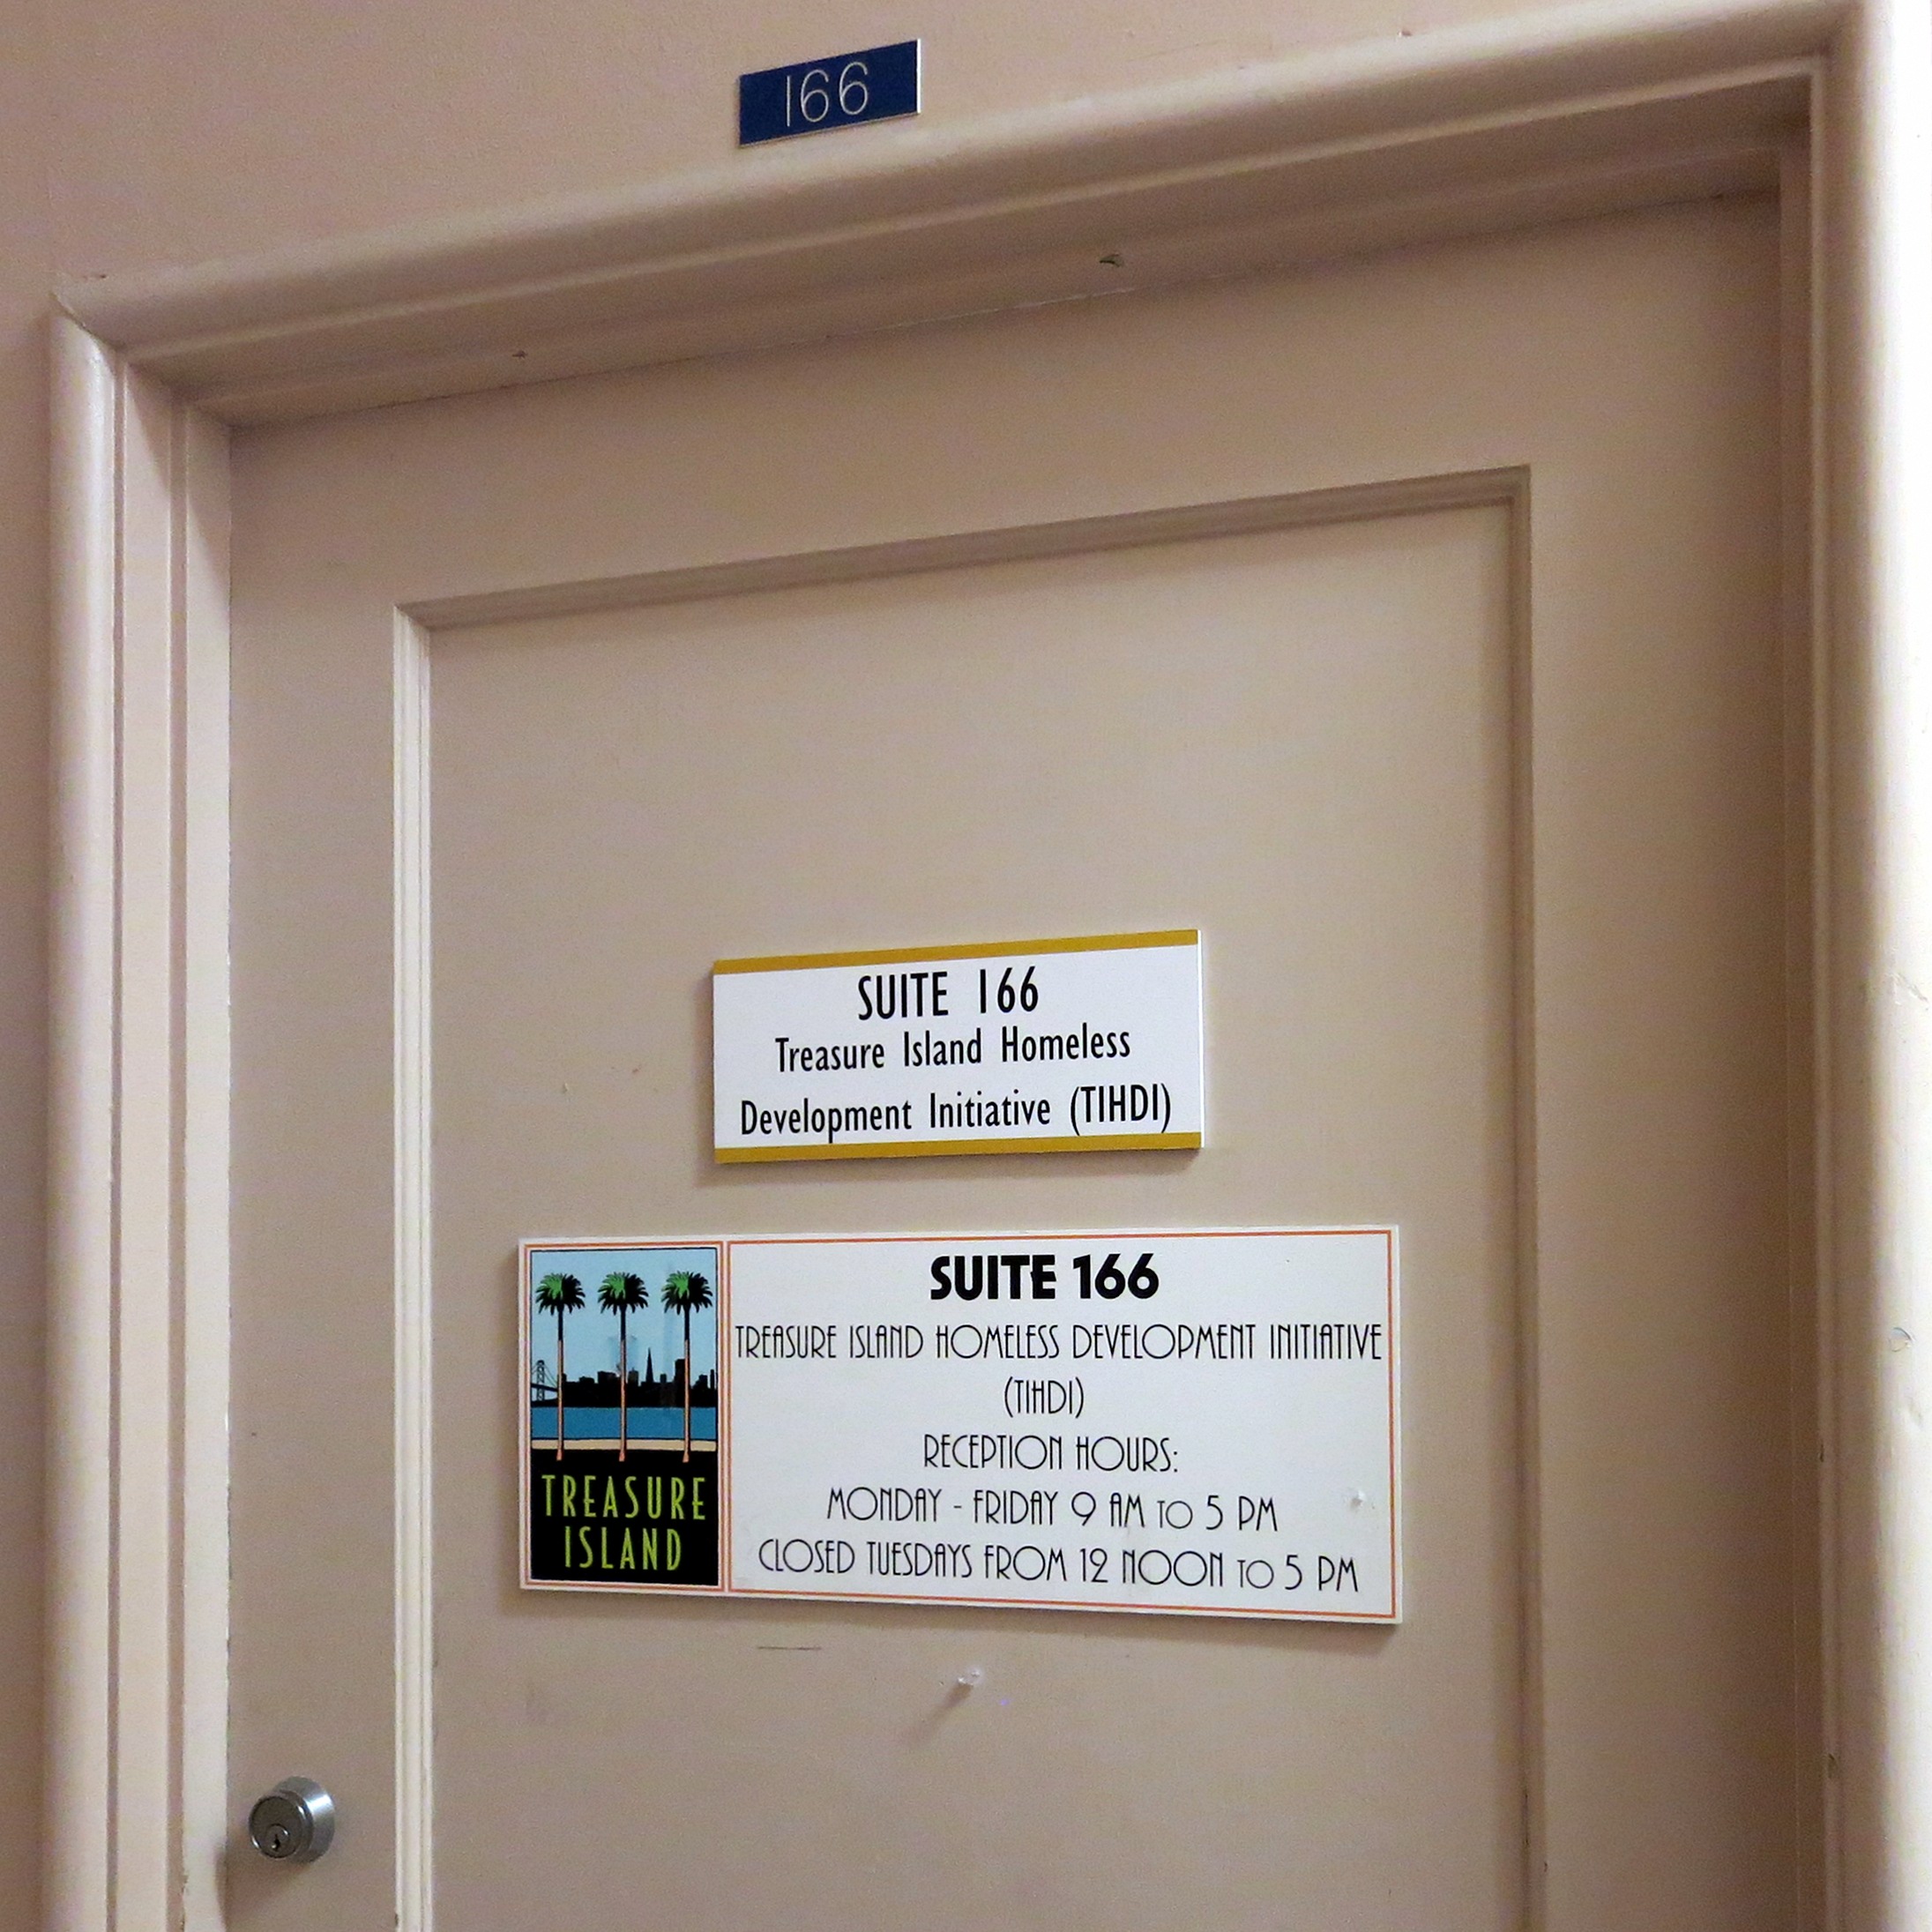
I was particularly taken with Suite 166, offices of the Treasure Island Homeless Development Initiative, TIHDI (“tie dye”). This seems like a good place for those offices.
Go to…
- top
- Accidental tourism
- Bridge walk and samples
- More ruminations on the old span
- Ghosts in the machine
- Lessons learned
…or read on:
Burma Road at last
Leaving Treasure Island, though now an hour behind schedule, we were hopeful of navigating down to the docklands by map. This proved more difficult than expected: we missed the turnoff to Maritime Street. It turns out you ignore Waze (still trying to get you to the toll booth) and make believe you are heading to 880 south toward San Jose. Just ignore the signs and keep to the right. Half a mile past the sign to Exit 8A you can spot the signs to Maritime Street/West Grand Avenue and Port of Oakland/7th Street.
It turns out you want all of these. Essentially, those signs add up to “Exit right to get off the freeway before being trapped on yet another freeway.” We were two lanes too far left to do that. So we took the first available exit off whatever ramp to 880 we were on and proceeded to navigate by the sun and our wits. The sun was working fine, but we should have known better than to trust to wits and my cell phone in unfamiliar hands.
The Port of Oakland is even more picturesque than Treasure Island—in a graffiti washed, tumble-down gingerbread-cum-new cubical apartment lofts sort of way—and equally deserving of its own travelogue. Again, today was not that day. The trick is not so much to find Grand Avenue or even Maritime Street but to get across the haphazard tarmac of the docklands to Burma Road. I use the term “road” rather loosely here. Everything is paved in one hard material or another, criss-crossed by sections of rail that often end abruptly or disappear beneath fences and stacks of building material: sometime the rat’s maze of temporary barricades is the only available guide to where the road is today.
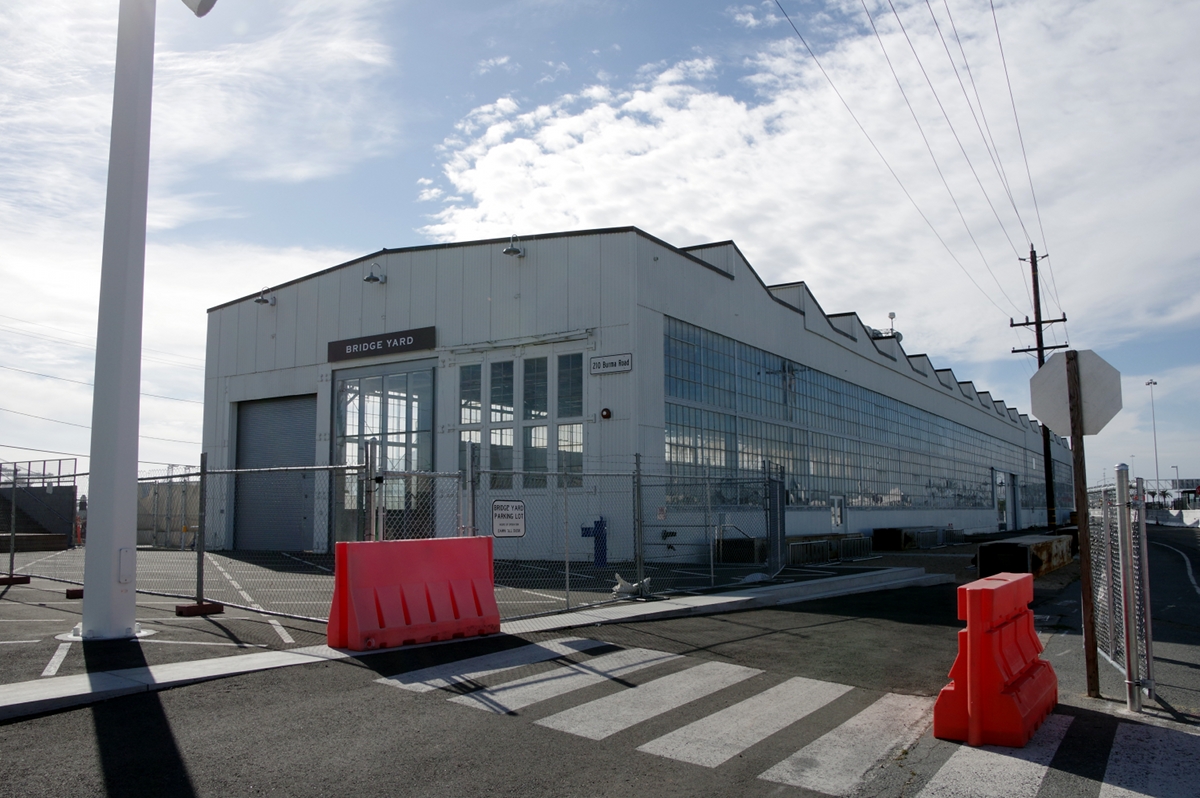
The Bridge Yard building at 210 Burma Road is the current landmark for the nearest trailhead. This facility was used in the new span’s constructions, and now lies empty as far as we could tell. Parking for the pedestrian bridge is available behind the building.
Go to…
- top
- Accidental tourism
- Treasure Island
- More ruminations on the old span
- Ghosts in the machine
- Lessons learned
…or read on:
Bay Bridge Assay 2: Bridge walk and samples
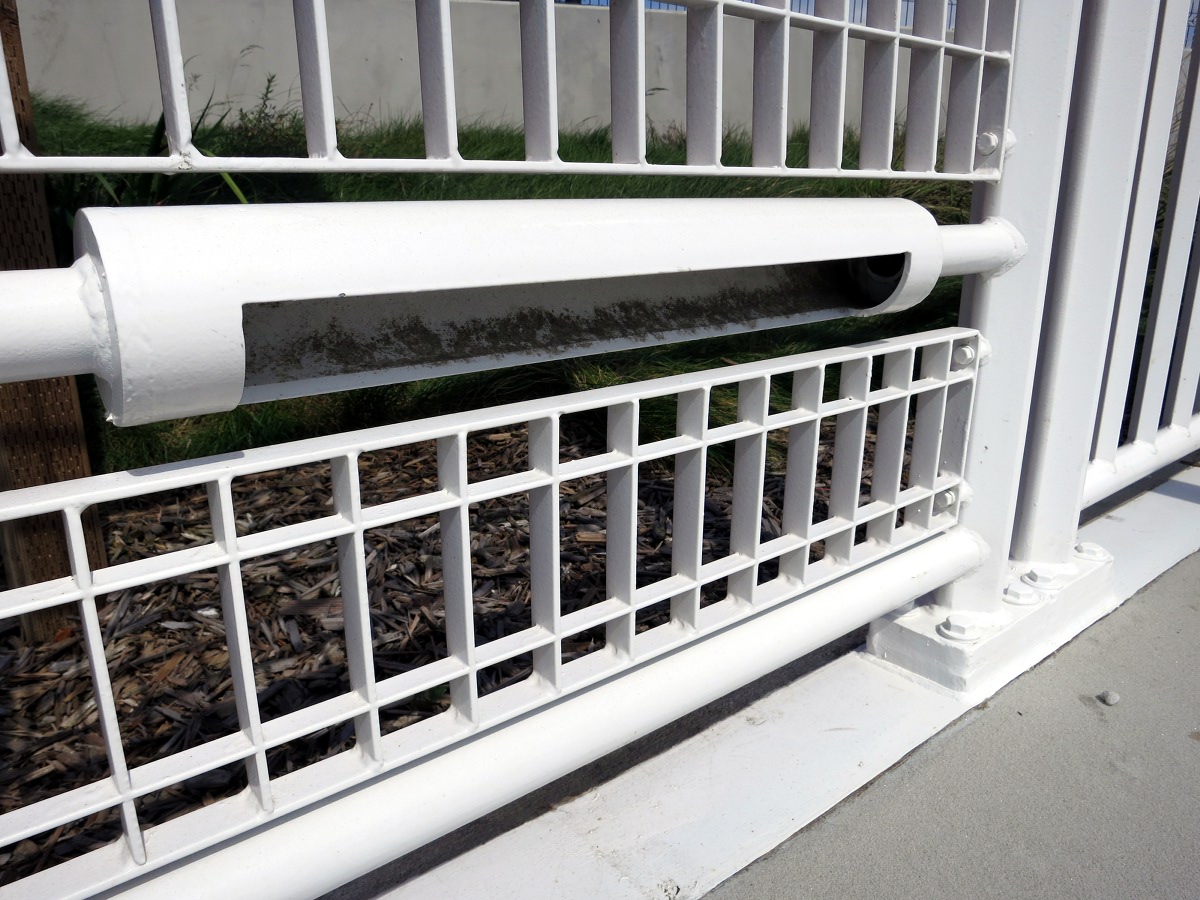
As often happens, you notice some things only the second time. Even at the beginning of the east span ramp, maintenance issues are apparent if you look for them. Footpath lighting appears in need of maintenance and may not be up to snuff. The steel construction might be described as robust…or even crude. Lighting covers appear to be falling out after only two years. In a few cases the covers had been zip-tied in place. Here, the cover is missing entirely.
Compared to Assay 1, the entire milieu was sonically more active. There was a stiff breeze blowing out of the west. Traffic was moving faster than on a weekday afternoon (this was on Saturday) and there were more cars on the road, though possibly fewer trucks. Everything seemed a bit louder, though memory isn’t a precise gauge. We discussed the matter near an expansion joint part way up the ramp.
No Flash: SFBB 37 Very active Day (mp3)
Jacob captured the sound of traffic crossing an expansion joint with his hand-held M-Audio recorder.
No Flash: SFBB 38 Expansion Joint (mp3)

It turns out I was wrong in assuming the security cameras and light fixtures used the same housings. This is one of the unusual pentagonal light poles on the new east span, near the eastern end. Up close, we can see the surveillance cameras use a different mounting, presumably to allow situational orientation. We continued on up the ramp, sampling as we went.
A few hundred yards up the ramp, I sampled the support bracing for a road sign affixed at grade on the south face of the bridge. The sign appears to face an unnamed frontage road with access to the nearby westbound tollbooth employee parking; that’s where I suspect Waze was trying to direct us earlier.
No Flash: SFBB 16 Road Sign (mp3)
Here is the sound of a long panel of outer safety fence on the bridge, taken from the top inner horizontal rail. Note a peculiar quiescence at 33″ which is also displayed in other samples from this day.
No Flash: SFBB 17 Long Fence Panel (mp3)
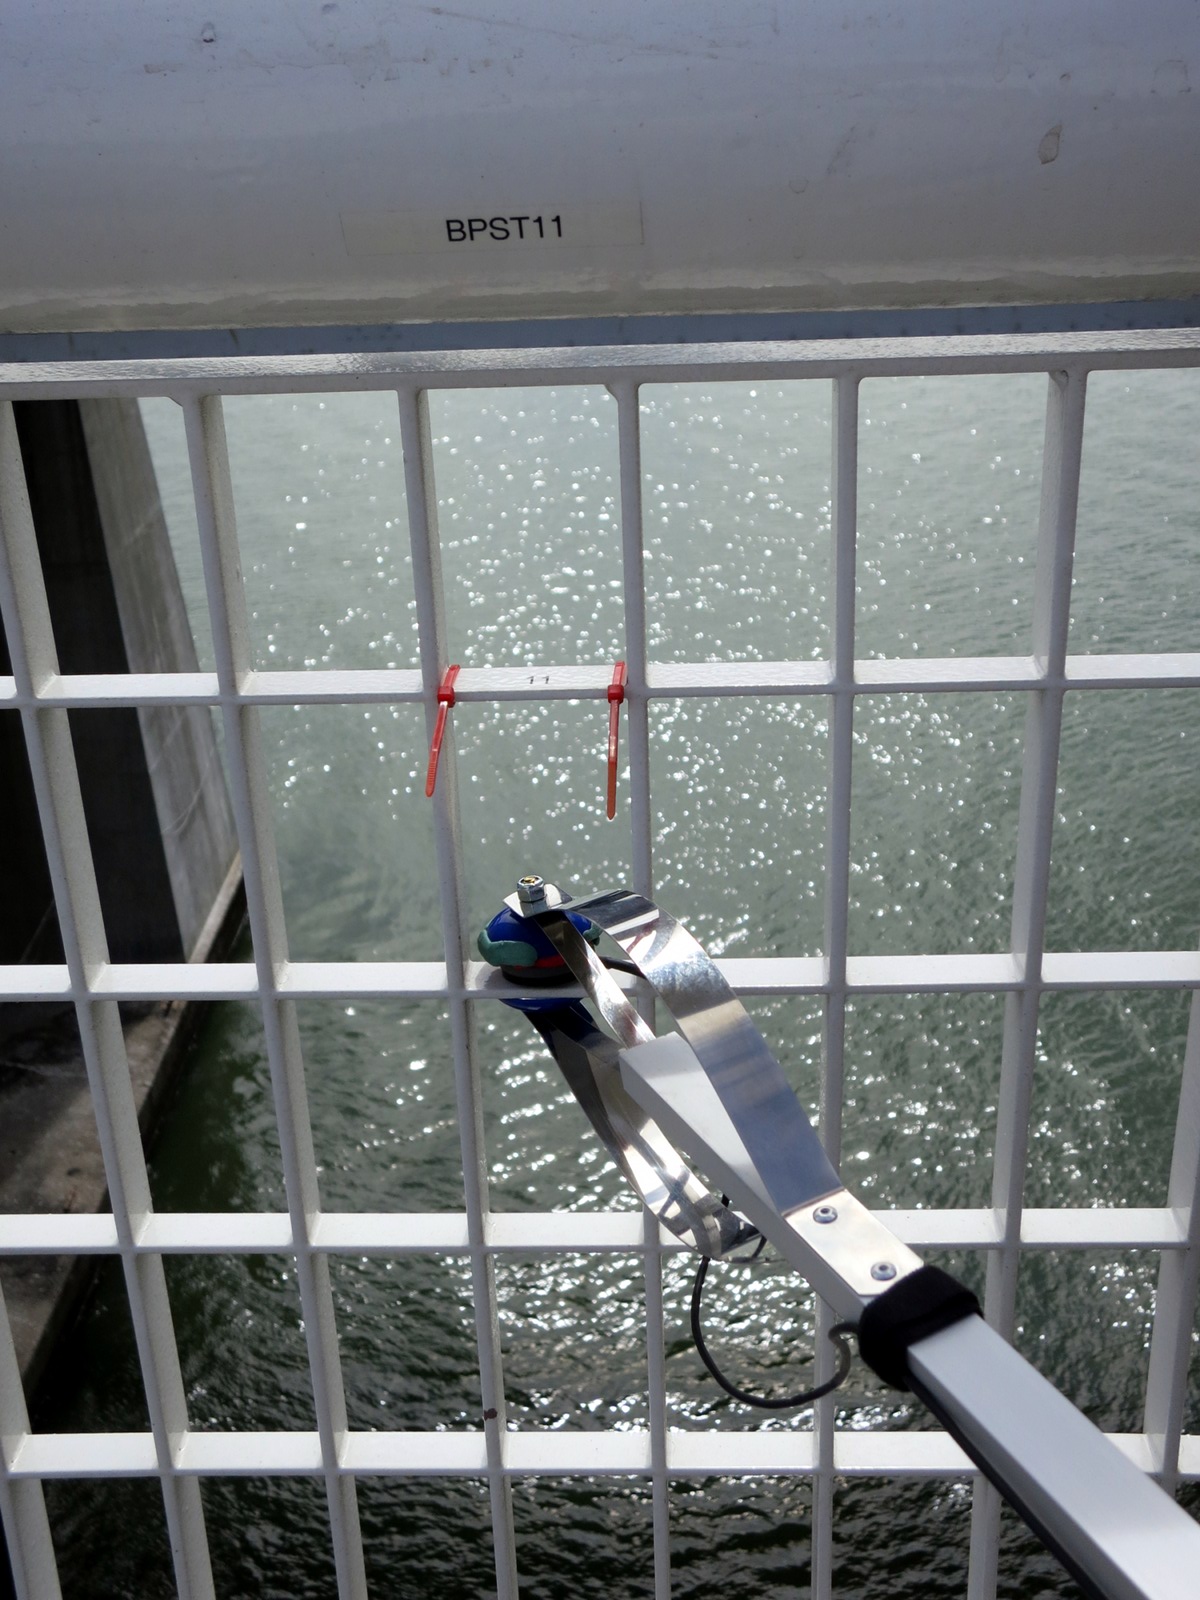
The fence panels all look pretty much the same, except for “BPST11,” which was marked and tagged with little red cable ties. It’s a short fence panel, counterpart to the prior sample. The photo shows the E-Z Reacher rig in action, fully clamped.
No Flash: SFBB 18 Fence BPST11 (mp3)
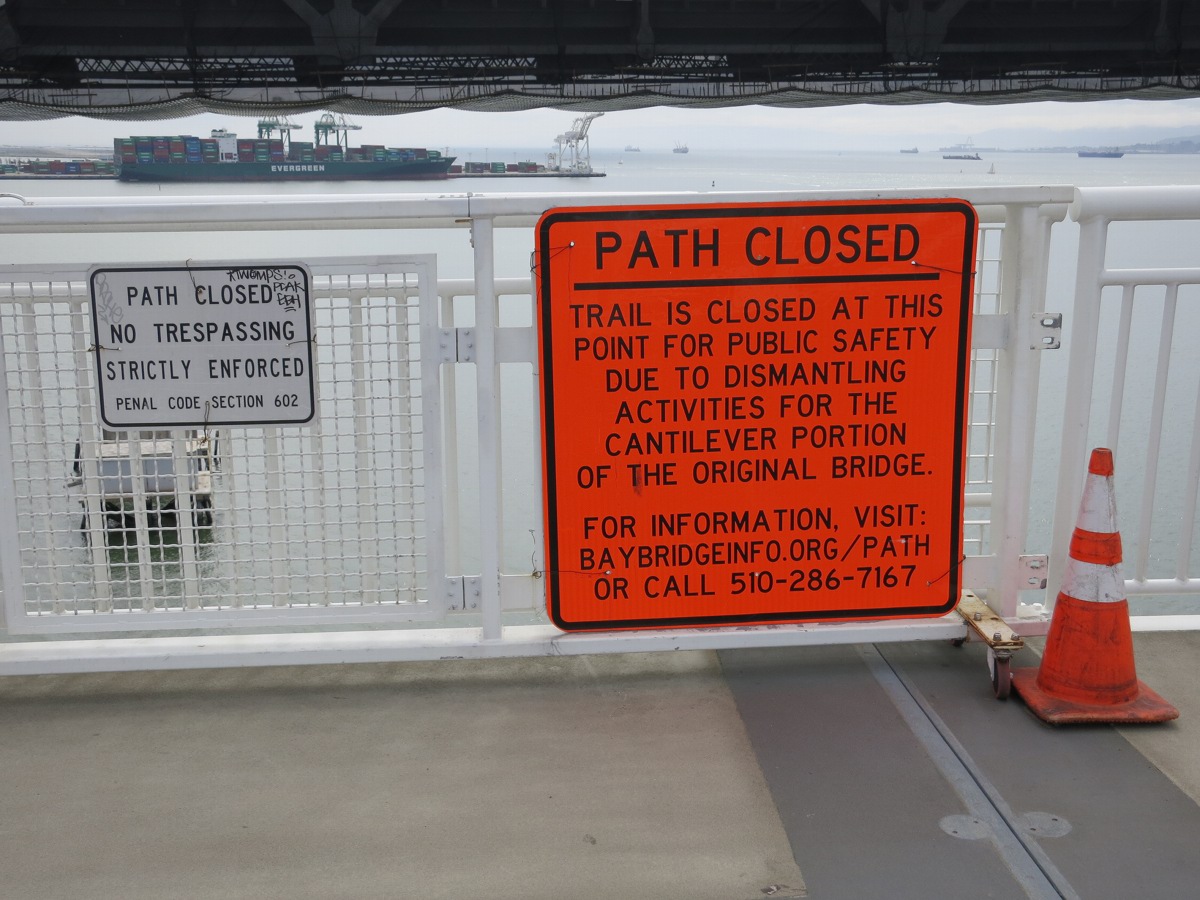
BPST11 was near the area of the old span then being torched to pieces. The walkway is fairly close to the old span here—maybe forty yards from the work—and during working hours the span is often closed to prevent smoke inhalation and other (real or imagined) hazards. Past this point, it’s still a long way to the suspension portion of the span.
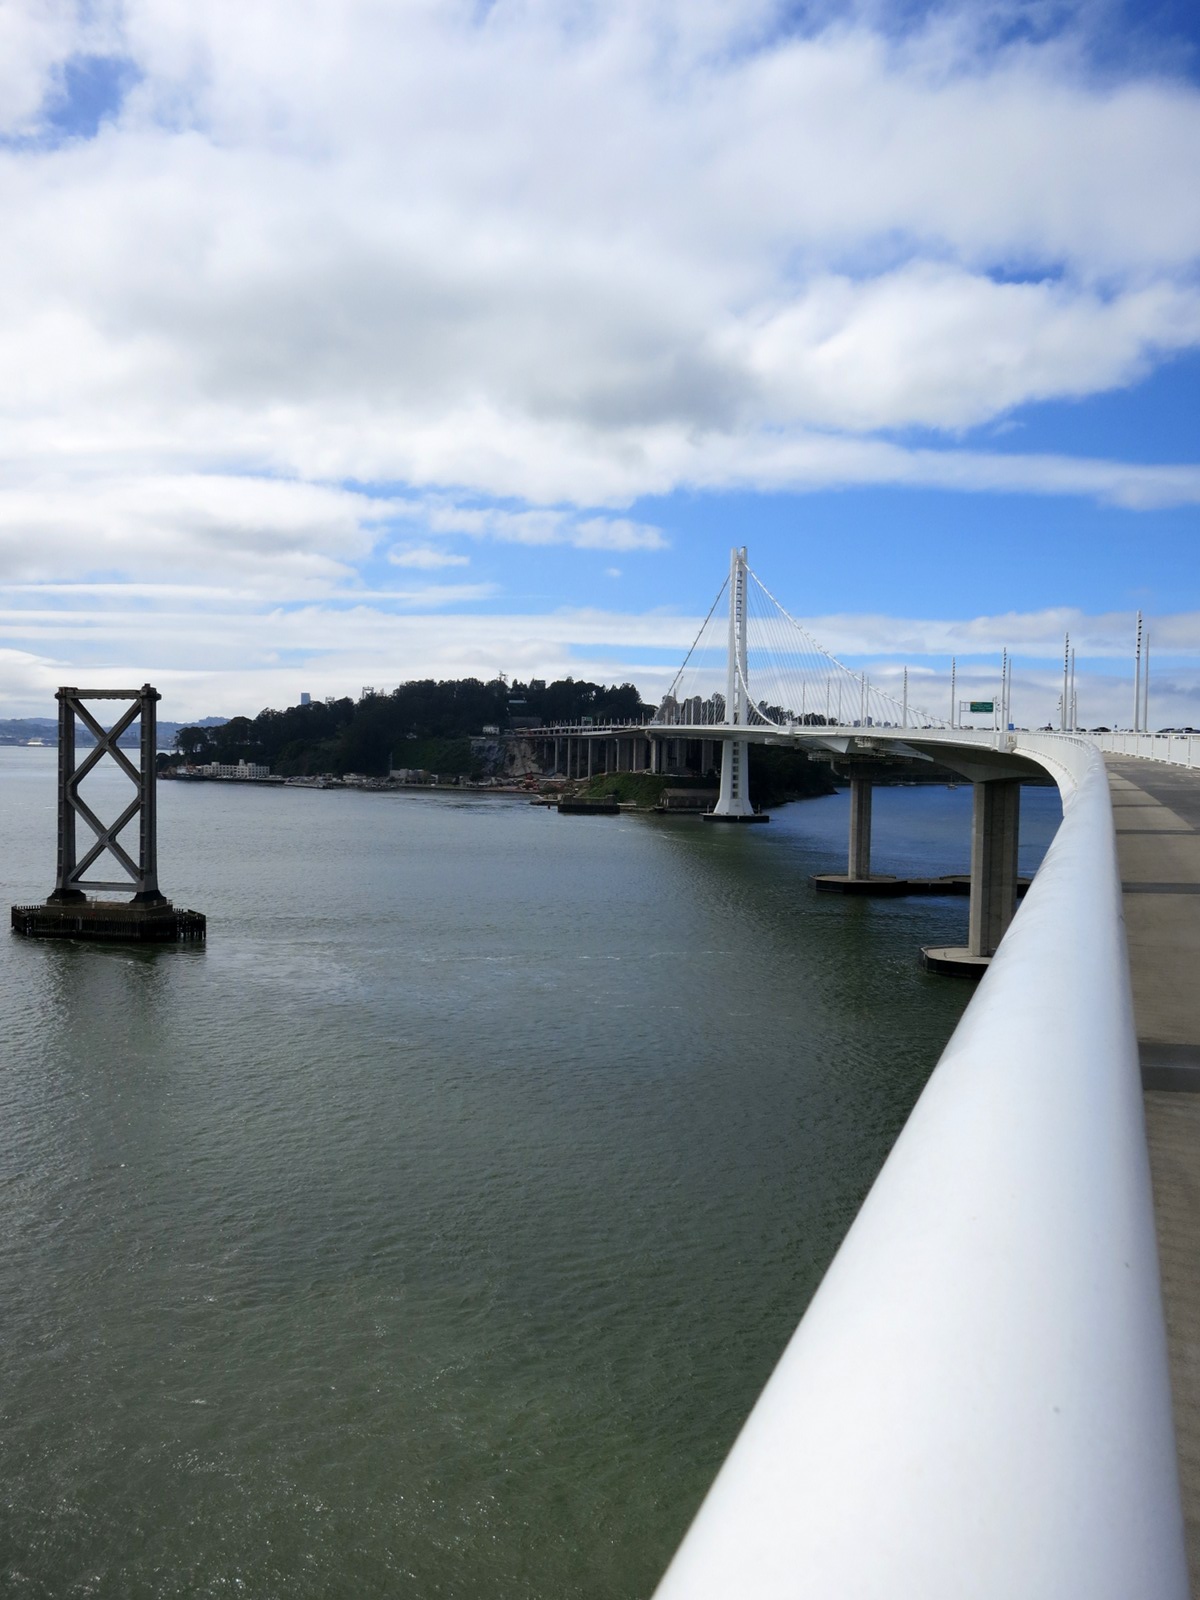
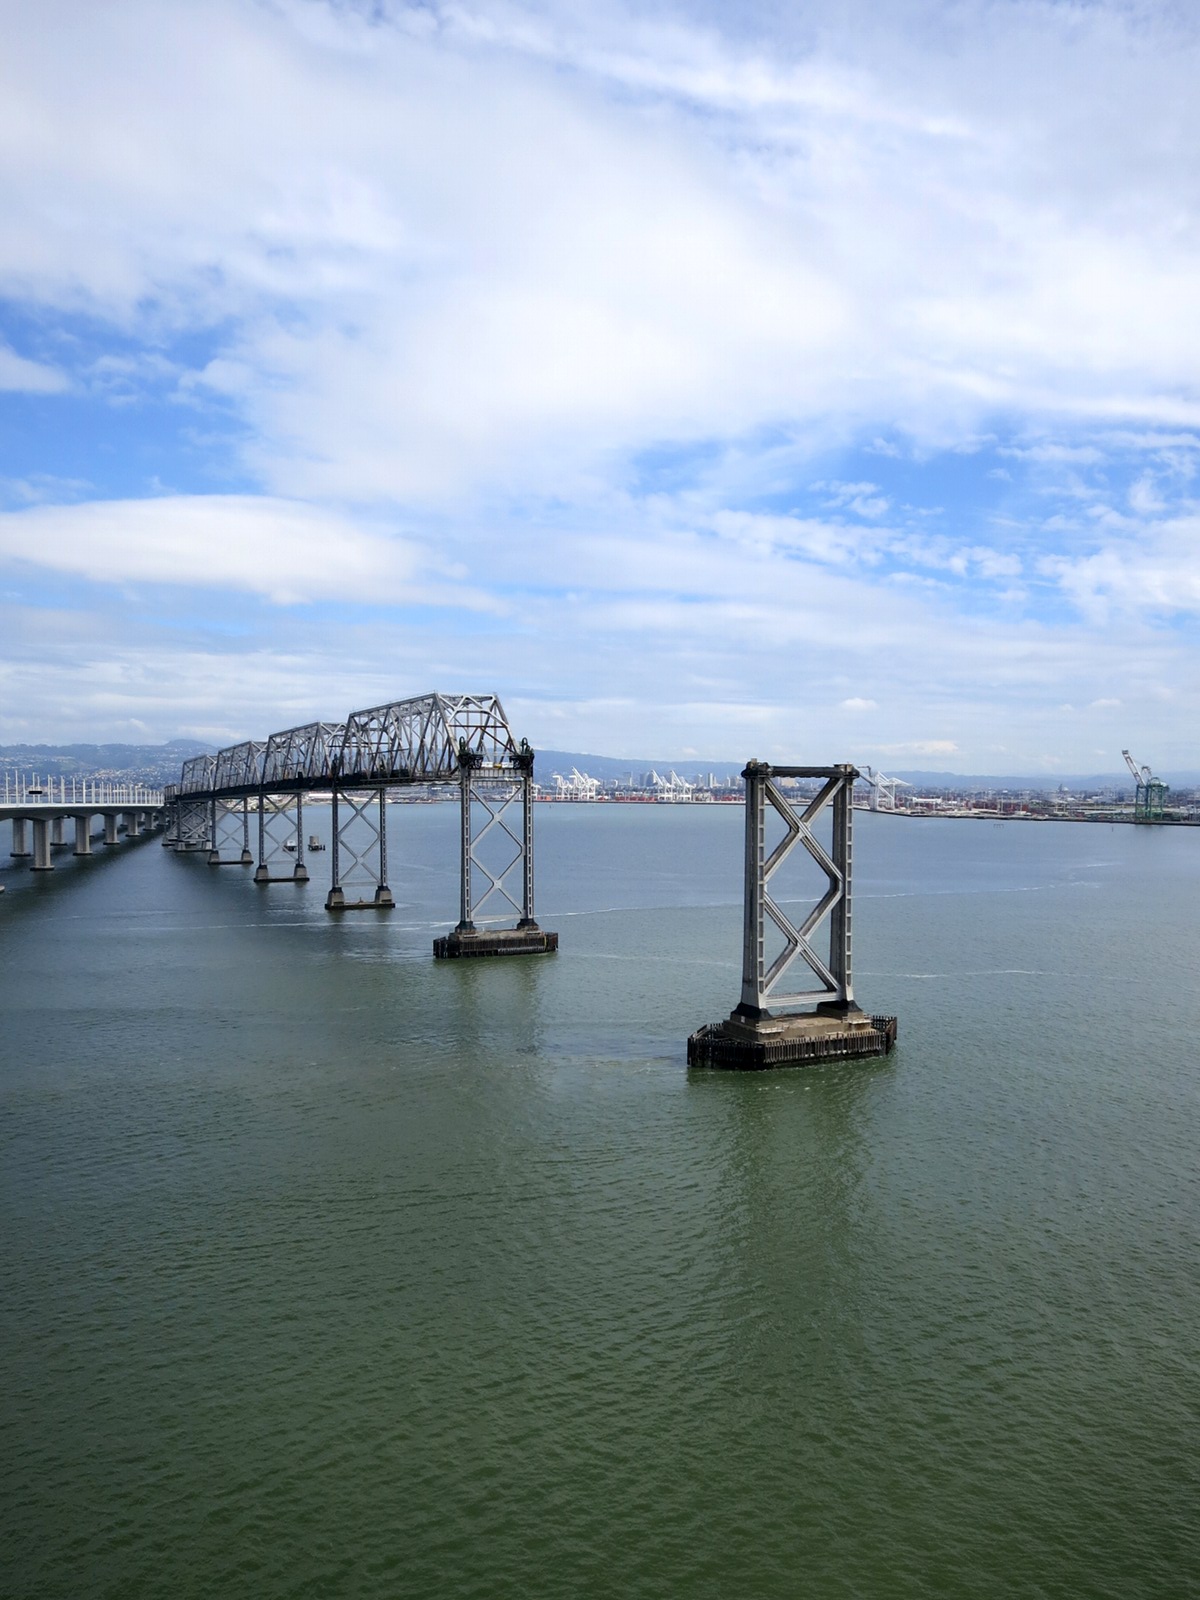
Here is most of the east span at a glance, with one lonely pylon from the original 1937 span seen still standing to the left. Although it looks like an unbroken line of white paint, the outer safety rail is divided into sections. Relief from the traffic of runners and cyclists is afforded by short rest stops spaced at intervals on the way up. These tend to have a bench or two to sit on and an emergency call box. They appear as box-like details dotting the length of the outer rail in the photo.
This sound was taken from a long panel of outer safety fence on the SF Oakland Bay Bridge east span, at the first rest stop on the way west, taken from the top inner horizontal rail. There is some handling noise throughout (pops).
No Flash: SFBB 19 Rest Stop 01 Inner Rail Top (mp3)
Here is a sample taken from the bottom inner horizontal rail of the same section. The tone is much lower and mellower than the top. There’s some handling noise near the beginning.
No Flash: SFBB 20 Rest Stop 01 Inner Rail Bottom (mp3)
Here’s another sample of the same section, this time taken from a slat between the upper and lower rails.
No Flash: SFBB 21 Rest Stop 01 Inner Rail Slat (mp3)
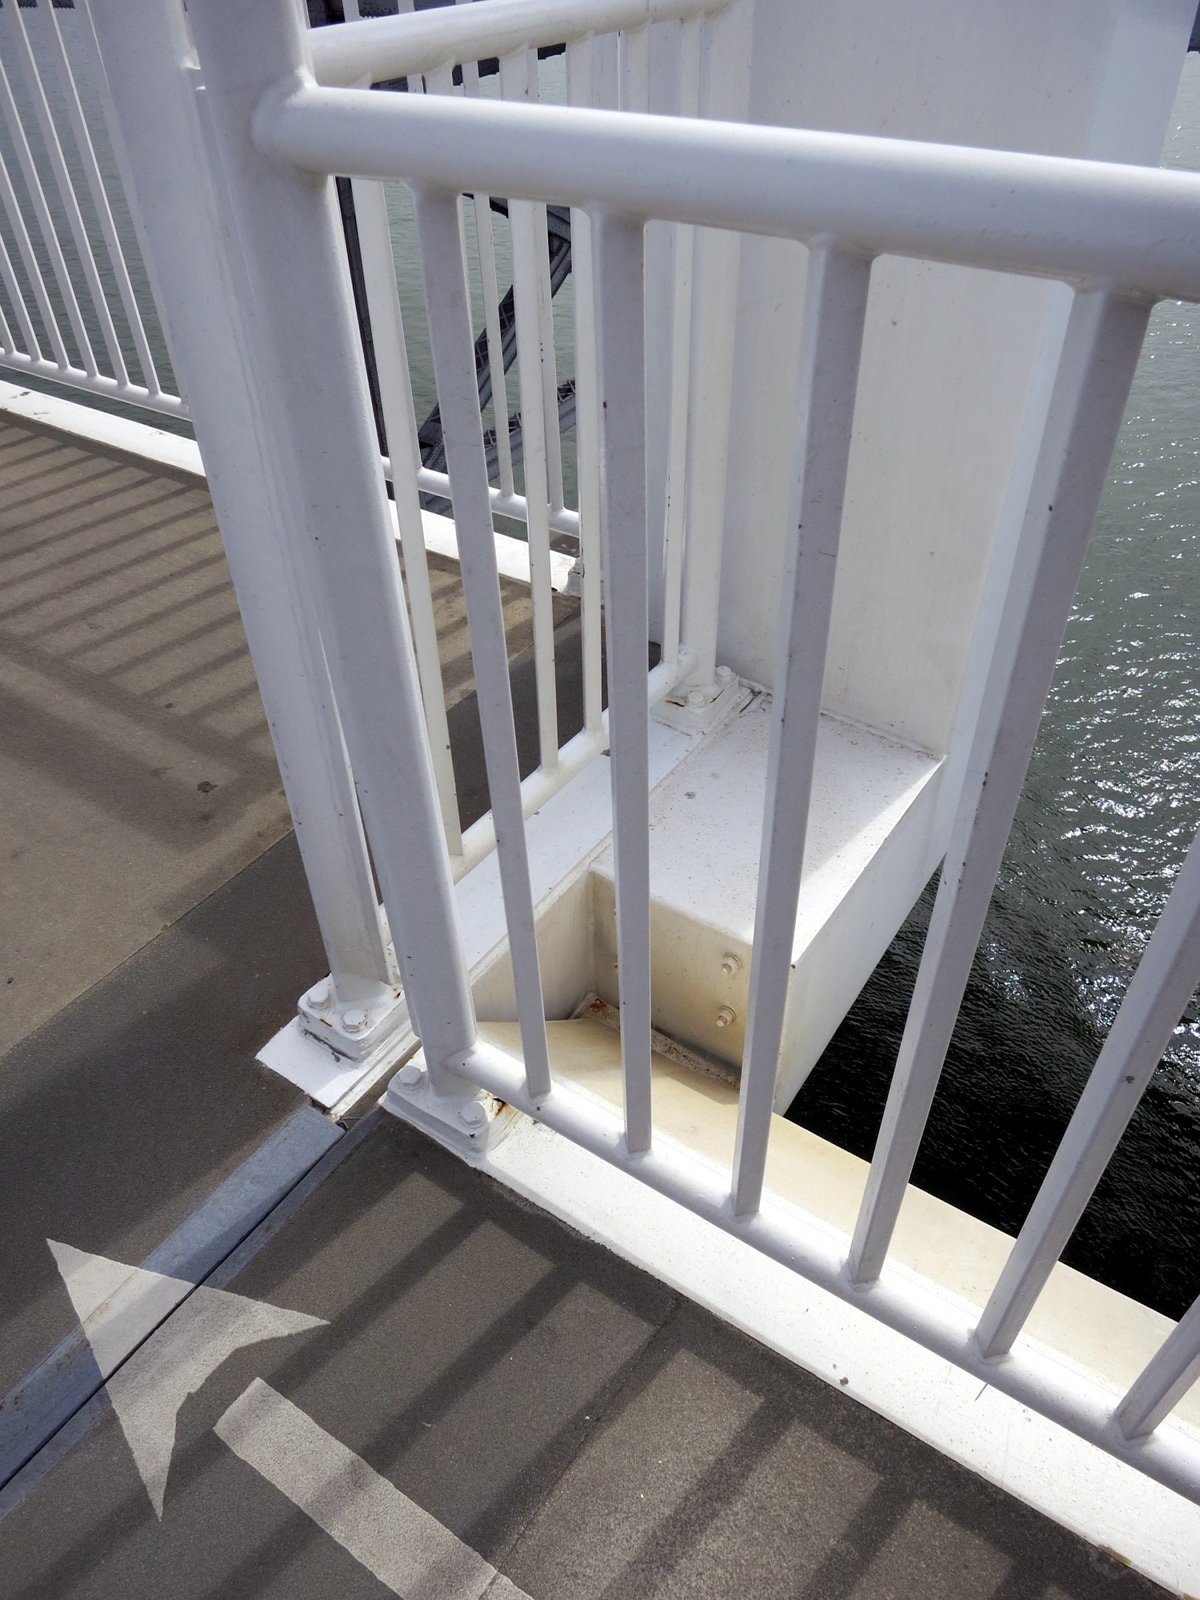
While the rest areas appear quite plain and simple—just two-foot extensions of a flat walkway—they represent a fair amount of mechanical complication. Take, for example, the box-like extension shown in the lower part of this photo: in several cases, we saw bolts through these boxes that had been carefully masked during painting but had yet to have their nuts tightened. Because the rest areas jut out over the water a bit farther than the rest of the trail, they also have interestingly short sections of safety railing. These sound just a little different from the larger sections.
No Flash: SFBB 22 Rest Stop 01 Offset Bottom (mp3)
This is the sound of a metal rest stop bench on the SF Oakland Bay Bridge east span, at the fourth rest stop on the way west, taken from the grillwork of the seat. Again, some minor handling noise at start.
No Flash: SFBB 23 Rest Stop 04 Bench (mp3)
This is a recording of another very short panel of outer safety fence on the SF Oakland Bay Bridge east span, taken from the lower inner rails. Original recording gain was increased by about +6dB at this stage in the walk.
No Flash: SFBB 24 Rail Short 02 (mp3)
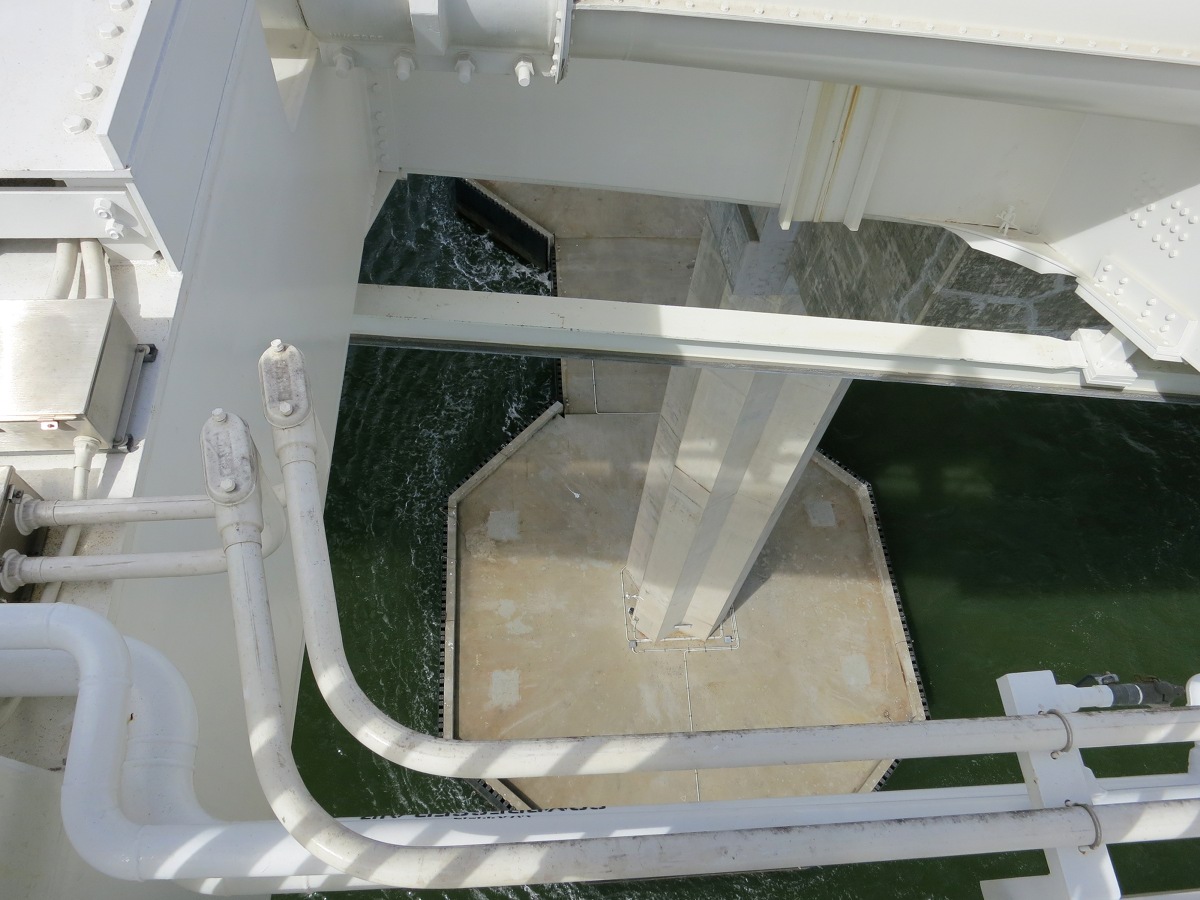
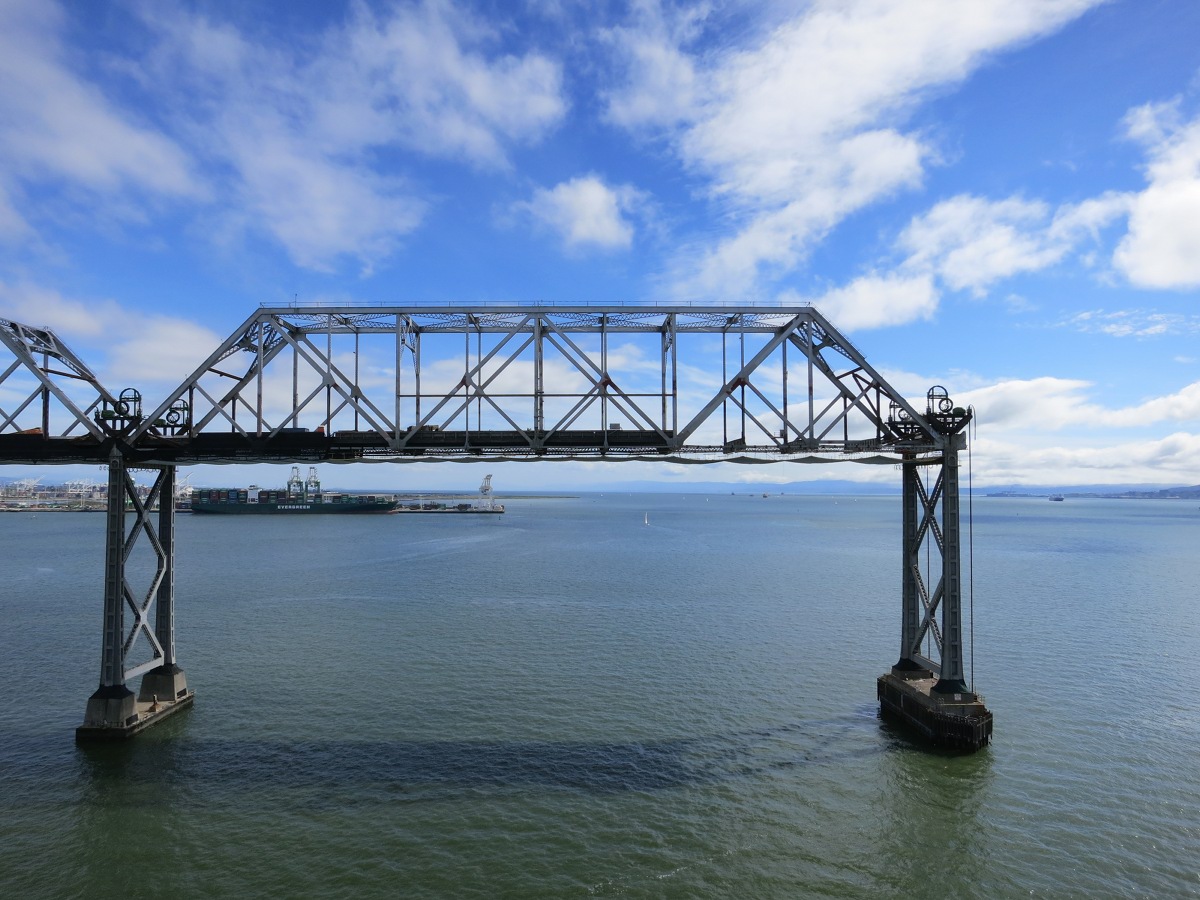
There’s a rest area right near the end of the suspension section, home to yet more complication. The last new pier before the longest section of the span is here. You can see there is one column for each side of the roadway, tied together at the base by a single pier.
Here, the end of the span is anchored along with the long cables, and the slow, steepening climb up to the saddle begins. As the suspender cables lengthened, we finally got to put the E-Z Reacher rig through all its paces.

Here is the base of the third suspender cable on the south side of the Bay Bridge east span, counting from the east end after the first few directly bolted trusses (which have no cables).
No Flash: SFBB 25 Suspender SE03SW (mp3)
It turns out the forty-two inch reacher model was sufficient to reach the suspenders themselves, but we struggled to reach the safety railings. Like the rest areas, they turned out to be complicated; we were disappointed that the lower sections are quite short, attached by turnbuckles to stanchions that, in turn, terminate the long cables. There’s some bass here, but not what we’d hoped for. Some very loud handling noise from the reach-extension tool has been leveled manually in this clip.
No Flash: SFBB 26 Lower Safety Cable at SE04SW (mp3)
Here is the upper safety cable at the fourth suspender position. This is also a very short cable, fastened with turnbuckles to the same stanchion. My reach was thoroughly inadequate, but Jacob managed to stretch the E-Z Reacher into position while I dangled the recorder out over the gap between the walkway and the roadway (that is, over the water). Again, handling noise was significant and the loudest pops and clangs were leveled manually in this clip.
No Flash: SFBB 27 Upper Safety Cable at SE04SW (mp3)
Most of the remaining samples just follow the suspender cables as they lengthen toward the central pylon. As we’ve noticed before, there is no consistent, direct relationship between length and pitch at this scale. At least, there’s none we could detect by ear. Here’s the base of the fifth suspender cable on the south side of the Bay Bridge east span, counting from the east end.
No Flash: SFBB 28 Suspender SE05SW (mp3)
We did notice a significant difference between samples based on clamping pressure. The E-Z reacher model I used has a latching mechanism that proved handy for relatively thin sections of material, but problematic for fat chunks. The base of the seventh suspender cable, counting from the east end, is where we began to suspect clamping pressure was reducing fidelity. This sample was made at “full clamp” using the detented latch. Also note the brief bursts of electronic noise in this clip that would come to plague the remainder of the day’s recordings.
No Flash: SFBB 29 Suspender SE07SW (mp3)
Note the difference in the following sample. Clamping pressure is reduced to “hand-squeezed,” with some increase in handling noise but a much better bass response.
No Flash: SFBB 30 Suspender SE07SW Take 02 (mp3)
I took another sample of the standpipe supply line, this time out on the eastern end of the suspension span. Clamping is at hand-held pressure, with the usual noise trade-offs (pops manually leveled).
No Flash: SFBB 31 Standpipe at SE09SW (mp3)
Here’s the base of the thirteenth suspender cable on the south side of the Bay Bridge east span, counting from the east end. Quiescence of a sort occurs at 06″and 037″.
No Flash: SFBB 32 Suspender SE13SW (mp3)
The base of the seventeenth suspender cable on the south side of the Bay Bridge east span displays the annoying “radio” glitch at 04″ and again every 4.615″ or so thereafter.
No Flash: SFBB 33 Suspender SE17SW (mp3)
Here’s the base of the twenty-fifth suspender cable, again counting from the east end. Surface noise from a light clamping action almost masks the “radio” glitch every 4.615″.
No Flash: SFBB 34 Suspender SE25SW (mp3)
The base of the thirty-third suspender cable on the south side of the Bay Bridge east span is the last one before the “gap” as the main cable traverses the main pylon. The “radio” glitch remains steady every 4.615-4.620″.
No Flash: SFBB 35 Suspender SE33SW (mp3)

I paused near the center to take a few shots of the central tower. Here we noticed irregularities in the paint on the pylon, quite distinct in the glare of the midday sun. In this light, the effect is decidedly “spotty.” It’s certainly not unforgivable to have a little variation at this scale, but the irregularity hints at the many quality concerns that have dogged the new span through its short lifetime.
And then, there we were, at the end of the line. The base of the third suspender cable on the south side of the Bay Bridge east span, counting from the west end, is the last one pedestrians could reach in March 2016. The “radio” glitch remains steady every 4.615-4.620″ and appears stronger this close to Yerba Buena Island.
No Flash: SFBB 36 Suspender SW03SW (mp3)
The walkway still terminates a few hundred yards off of Yerba Buena Island, and you get to walk back.
Go to…
- top
- Accidental tourism
- Treasure Island
- Finding the Burma Road trailhead
- Ghosts in the machine
- Lessons learned
…or read on:
More ruminations on the old span
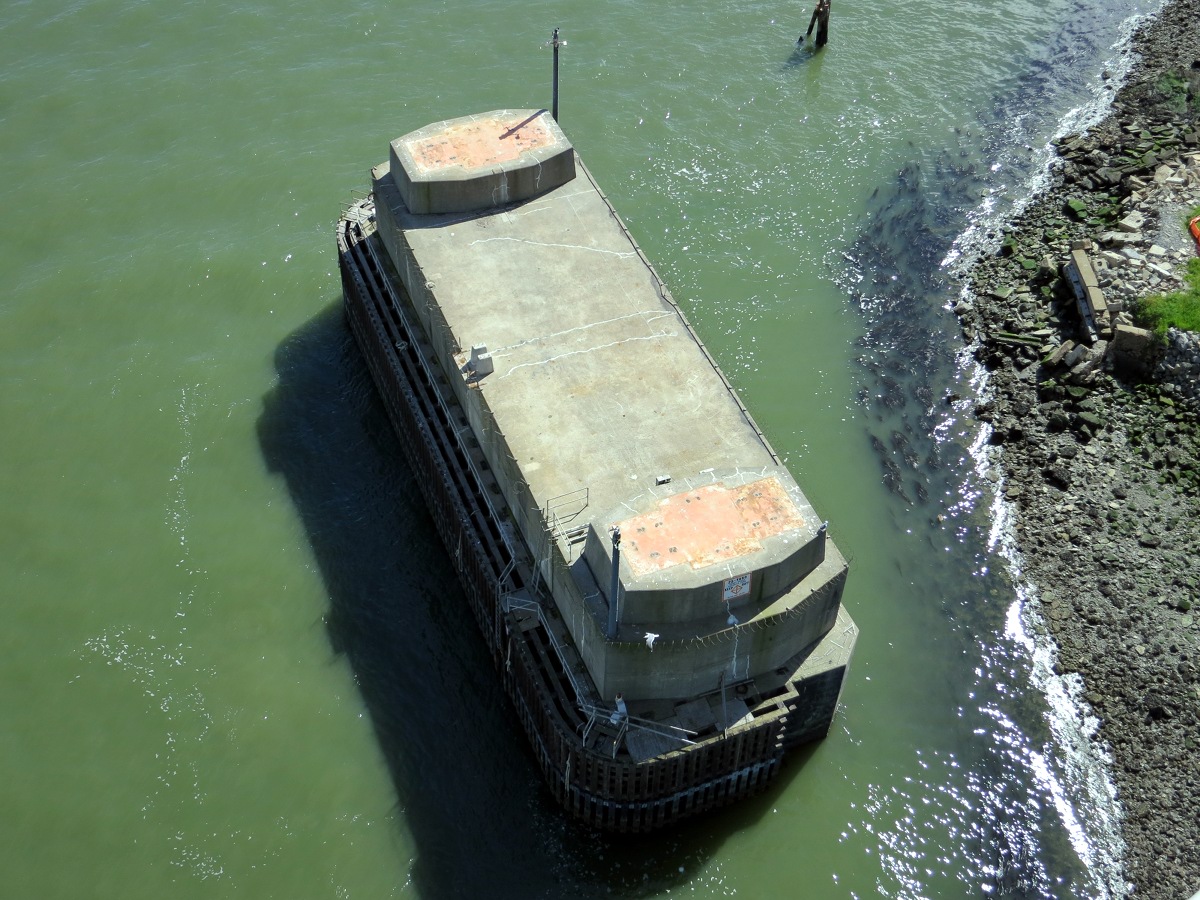
The old span continues to diminish just to the south. On the Yerba Buena Island side, one old pier remains that seems to be in no one’s way, being so close to shore. There’s probably no return on investment to remove it, and my guess is it will be around a while.
The look back toward Oakland has changed just a bit since November. One more pylon has been cleared and stands ready to come down. One presumes the pier below it will be removed, too, though there doesn’t seem any urgency about that. It’s hard to say whether the impact of explosive demolition to sea life is worth the turmoil, but the piers just standing out there by themselves will probably endanger small craft. Who’s to say?
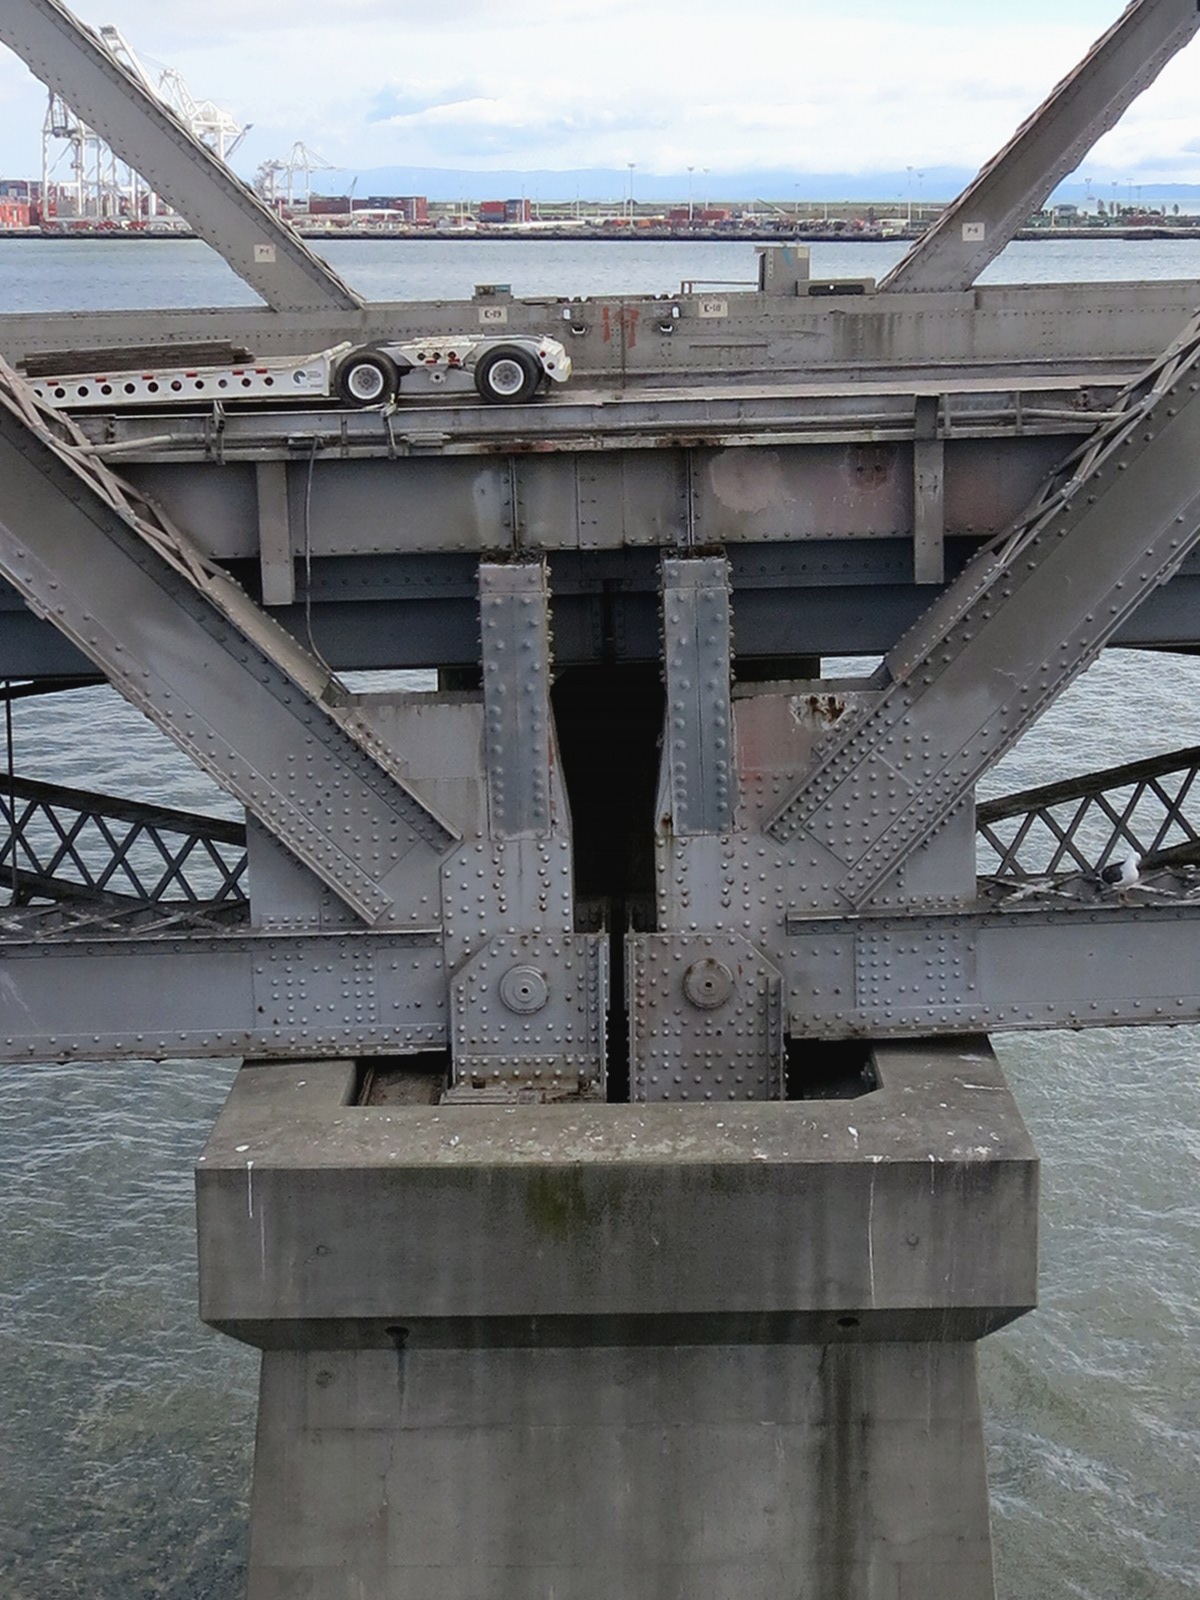
The work at the end of the old span’s roadway is probably the most complicated activity out on the Bay Bridge at the moment. Reels of cable—or are they hoses?—jut up at the free end from some complicated machines we couldn’t quite make out; these seem to be related to the cutting work. Netting is slung underneath the deck, which seems to be missing entire sections at this point. The demolition is clearly slow work, and at this rate may take another year or more. It feels as though the old bridge is just fading gently away.
There were a number of tractor rigs and trailers parked over on the old span, some already loaded with bits of old bridge to be hauled away. We wondered where it’s all going, what it’s good for. Again, who’s to say? But it’s probably a pretty good story.
Ghosts in the machine
As we neared the bottom of the ramp, I took a few shots I felt sure I’d taken before. This time however, I saw things looking back.
A “What are you lookin’ at?” expression, with a chin to match.
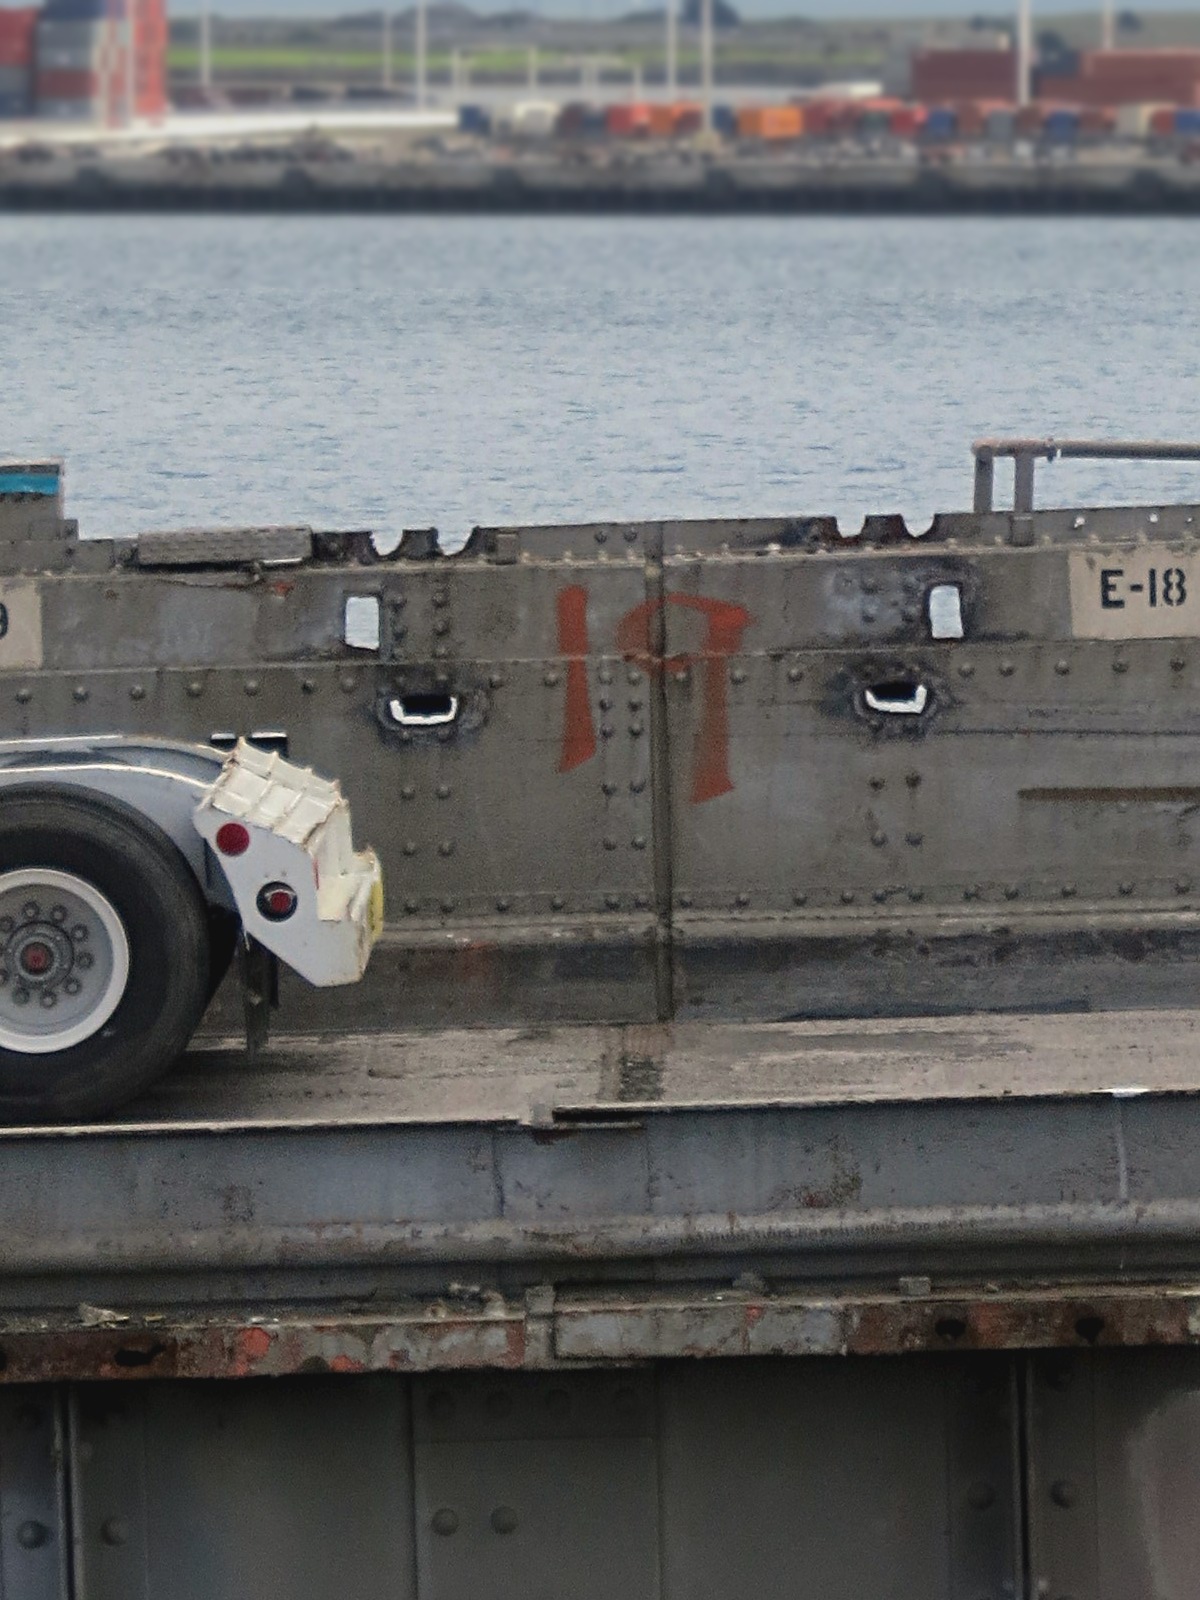
Just above, a sultry pair of eyes left by torches removing the upper deck.
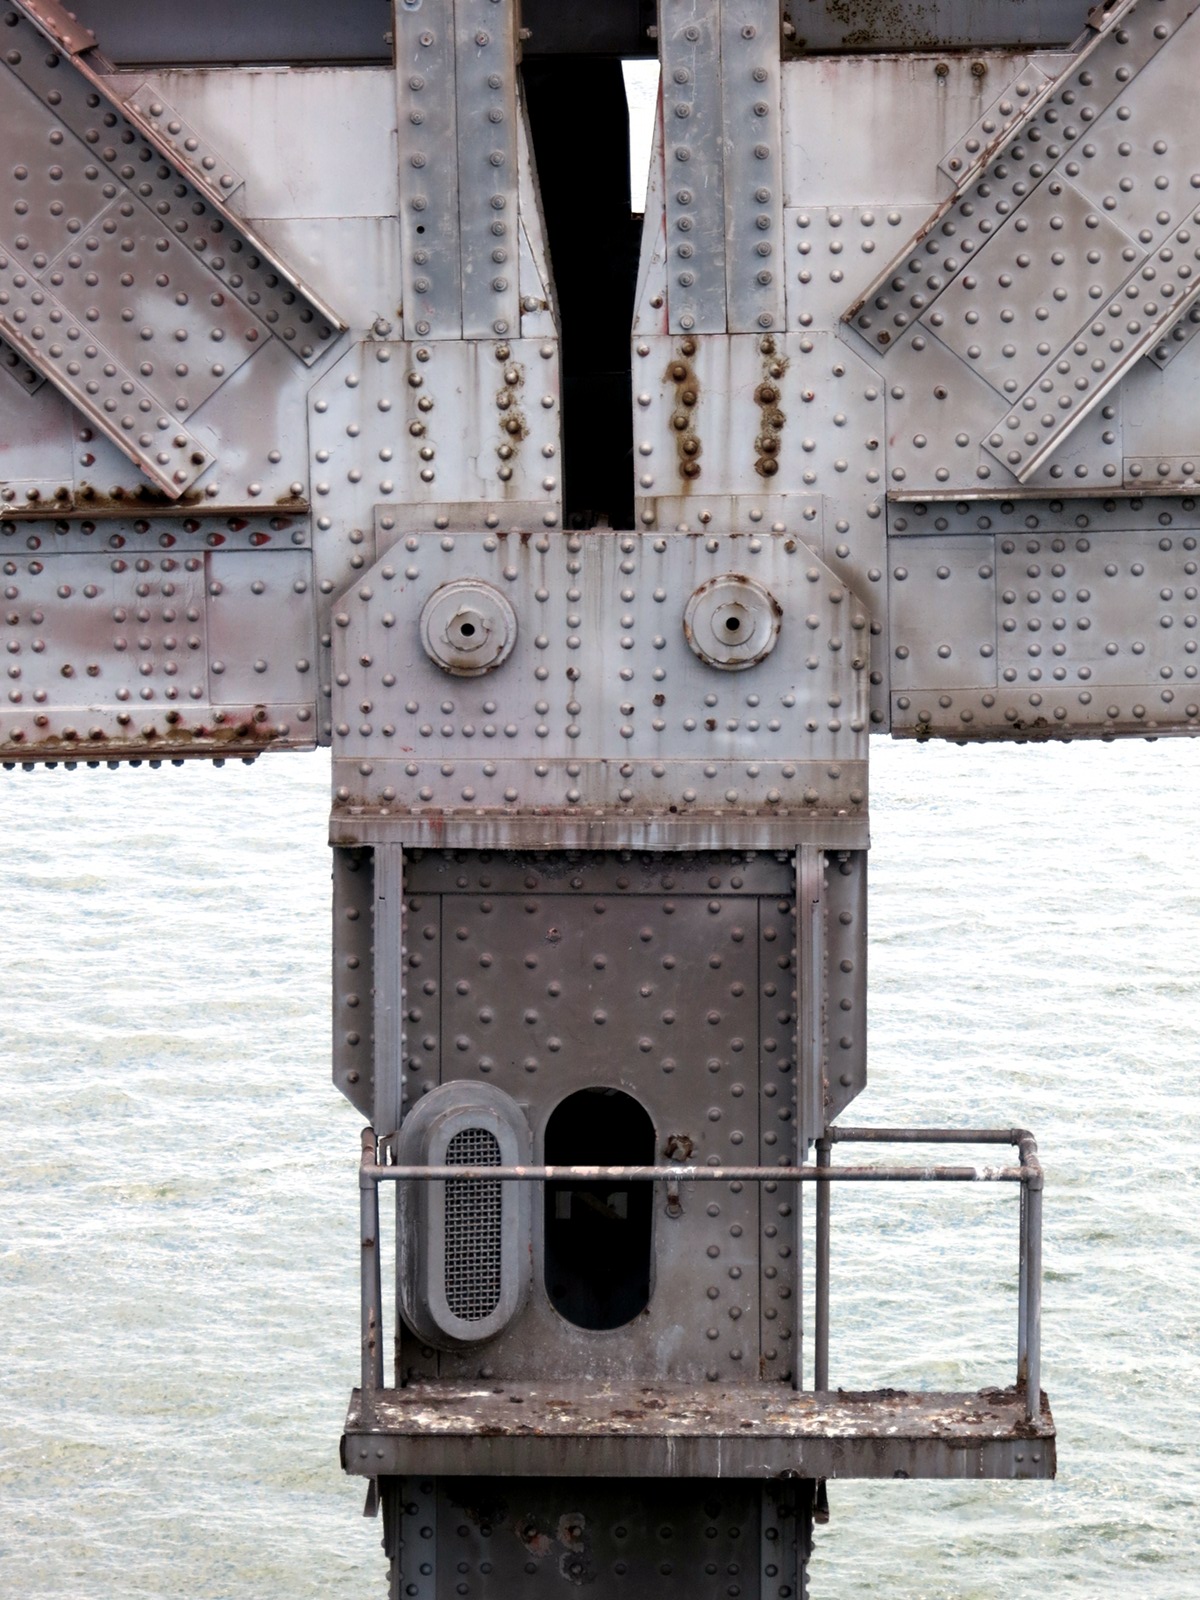
The open hatch screams “Don’t do it! Don’t jump!” Love the hair….
Go to…
- top
- Accidental tourism
- Treasure Island
- Finding the Burma Road trailhead
- Bridge walk and samples
- More ruminations on the old span
…or read on:
Lessons learned
Here’s the E-Z Reacher mod as it looked at the end of the walk, where the pedestrian path ends. The wind guard is gone. The putty is “generously” applied. Besides grabbing some more bridge samples for our collection, this walk was intended to test some new approaches to doing it. Did we learn anything?

Quite a lot, actually:
- Lesson #1: A couple of washers are needed to securely clamp down the wind guard (a trimmed-down silicone kitchen funnel; see my T Rex dreams).
- Lesson #2: A more pliable funnel material would have reduced the guard’s tendency to push back over the reacher arm in the first place. I suspect it would also make for a more effective wind guard, allowing the cup to conform more easily to irregular and curved surfaces.
- Lesson #3: A more reliable adhesive method is needed. Either the cup material or the putty used needs to change. Alternatively, the red foam ring could be permanently adhered to the cup, and the putty used only to attach the mic to the ring.
- Lesson #4: The best way to reduce handling noise is to brace the near end of the reacher firmly as the clamp is engaged and before starting recording; then hold really still (as always, easier said than done).
- Lesson #5: Clamping pressure matters. Fine tuning of the E-Z Reacher clamp mechanism is needed to balance fidelity with the risk of handling noise.
- Lesson #6: Suspender cables are large! Extending the “jaws” opening by lengthening the arms would be useful; it should also tend to mitigate the clamp pressure.
- Lesson #7: Know your tools. Don’t expect a community-sourced traffic app to replace Google Maps. Buy that GPS logger if you want convenient waypoint geo-tagging. Look into Waze map editing to help others like you.
- Lesson #8: Be prepared! Treat this sort of expedition as you would any other outdoor trek. Food is important, especially if your schedule is set back by circumstances.
By the time I was ready to take a first test sample with the E-Z Reacher attachment, two things had happened. First, the silicone wind guard had slipped back over the spring steel “arm” behind the microphone and was just flopping around. I removed it, which required loosening the putty and detaching the microphone so the smaller blue cup could be unbolted and removed first. There is perhaps a bit more wind noise in some of the samples than there might have been, but only another assay could prove that.
The second problem was a bit more vexing: the Schertler putty refused to adhere to the smaller cup when reattached. The microphone kept falling out. In the end, I used a lot of it to build a sort of “putty donut” around the lip of the smaller cup. It used a lot of putty, but it beat giving up and heading home to refit.
Over the course of the walk, we observed things we had anticipated, but now got a feel for their significance. Handling noise is still an issue, and having a short length of aluminum box beam attached to the mic makes it critical to hold still. It’s also critical to ensure that all mic and control wires are clamped securely, but we had thought of that and had battened down all the loose wires.
It turns out that clamping pressure matters. It isn’t just a possible threat to the Schertler itself—the setup here doesn’t have putty between the mic and the target to buffer the connect force—it influences the frequency response of the mic. This isn’t a surprise, really. Predictably, high clamping pressure created a high-pass filter effect and resulted in tinnier recordings. Looser clamping gave a broader sonic range, at the expense of more handling and wind noise.
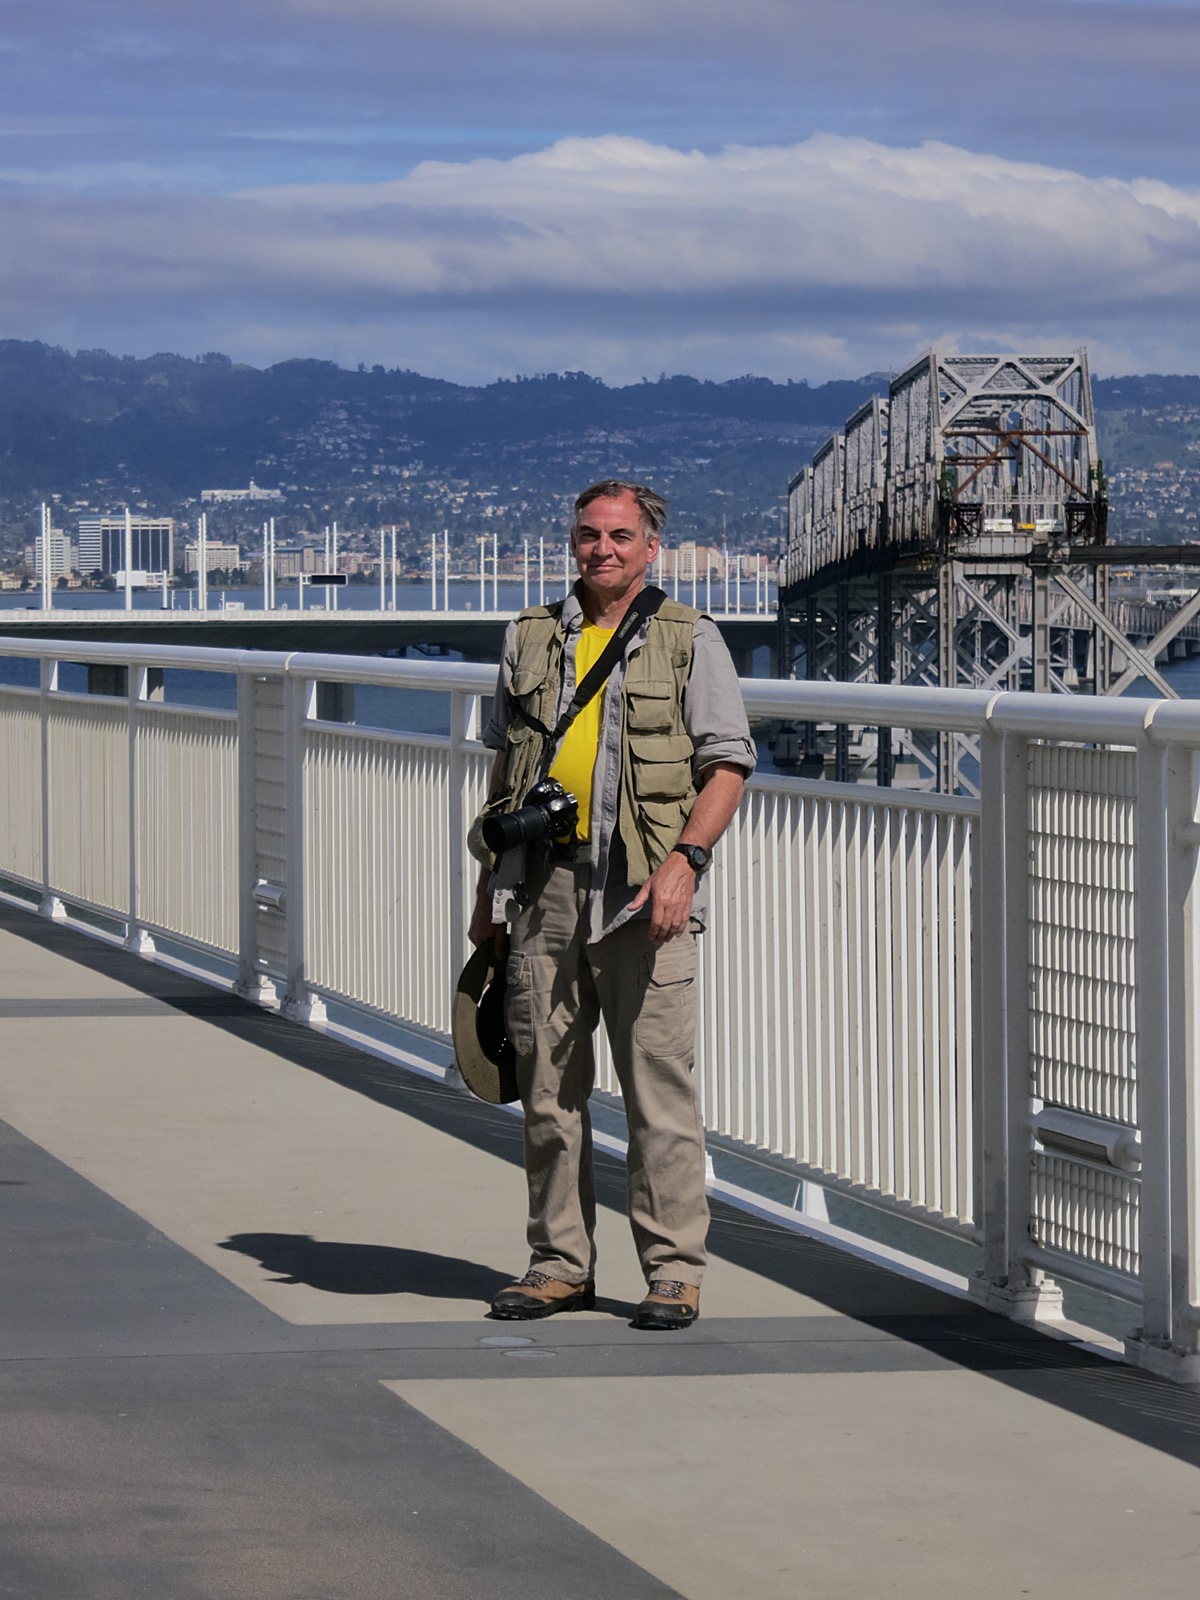
Here’s Jacob, out near the Yerba Buena Island end, victim of my failure to adequately provision the crew. One thing unrelated to sound recording, and no doubt already learned by urban explorers before us: take something to eat. We did reasonably well on outdoor gear and carrying water bottles for hydration. But after a one hour drive and two more hours of delays, we started nearly one meal behind. I didn’t even think about that risk, due partly to the seemingly urban surroundings and a habit of skipping lunch on the day job. But it turns out there aren’t places nearby to feed your inner furnace—certainly none in walking distance—and one can get depleted pretty quickly, even between two bustling cities. Take a snack.
So, we did what we set out to do: document some more bridge and test what we’ve learned so far, learning some more in the process. My conclusion is that the E-Z Reacher method works well enough to be worth a few tweaks and some further investigation. The suspender samples sound reasonably good. The final lesson is that my arms will probably always be too short to reach something I want to get that mic on, so we’ll have to keep mind, eyes, and ears open.
Go to top of article…

